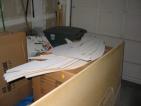
Completing the pattern cutting
posted 2003 Sep 29
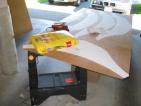
I cut the last few patterns from the hardboard this evening,
stations 0, 0.5, 6 & 7. After this, I will sand down the outer edges
of the hardboard exactly to the pattern lines, cut out the strongback
holes, and drill holes in the control lines (c/l and w/l). Then I'll
be ready to tack these hardboard pieces down to the particle board,
and rout around the pattern to get the stations.
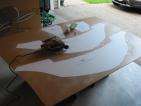
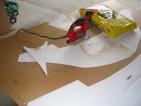
Cutting the patterns
posted 2003 Sep 28
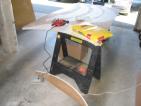
Today was the day for cutting the patterns out.
I got started around 1:30. After doing one small piece, I realised
I needed some eye and nose protection. I ran off to ACE hardware and
picked up some safety goggles and a facemask; I already had earplugs.
Manouvering the jigsaw (I bought a Skil
4580) was pretty easy. The supplied blade broke after about 1/3rd
of the way through; I picked up 6 new Bosch blades with 20 teeth per
inch, and they cut much better than the Skil blade did.
Another one of these blades broke as well, but this didn't phase me as
much (it was getting dull anyway).
I found it easiest to sight down the left side of the blade, which
meant cutting counter-clockwise around the patterns. Generally I
tried to cut off parts of the hardboard so I wouldn't have to make
many curved lines in the middle of the board, although that doesn't
work out all the time (sometimes the distance you have to cut isn't
worth it).
Each station took around 30 to 40 minutes to completely cut out,
depending on the size.
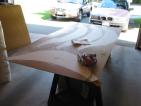
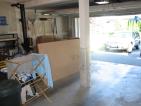
Construction begins
posted 2003 Sep 27
Construction begins!
Last night Tamara gave the OK to start building, even though we
haven't moved into the new house. I went down to Home Depot (Lowe's
didn't have 1/4" hardboard) and picked up the first elements for the
station patterns.
Greg on the mailing list had a great idea:
One more tip. If you are just about up to cutting your sections
now. Consider gluing the paper sections on thinner base material say 1/4"
hardboard (Masonite to you Aussies). Its easier to sand to the
exact size. Drill holes through the control lines then overlay it on
the station particle board and rout around it with a top ball bearing
1/2" diameter pattern/flush trim cutting bit (MLCS 2 flute carbide #
6506 1/4" shank $15) . This will leave you with an exact copy of the
section plan. You can mark the control lines on it and the scrap piece
is 1/2 inch larger all round and so with a 1/4" carpet padding will
perfectly fit the bottom of the hull when it comes time to rotate the
hull. It would also be a good template to help make the cedar cradle
and dolly.
That MLCS router bit is here.
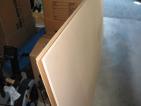
This is a great idea, and it's what I decided to do. I picked up
three sheets of 1/4" 4x8 hardboard, and one sheet of 1/2" 4x8 particle
board.
This morning, after dropping Tamara, Tristan, and grandma at the
airport, I started in earnest. Per the instructions, I did the following:
- laid out the full sheets on the 4x8;
- drew a positioning line along the top edge and the side edge;
- marked the centerpoint, to make it easier to line up the
sheets when the adhesive is tacky;
- sprayed 3M Super-77 down;
- placed the pattern down, then smoothed it out from the centre
outwards;
- trimmed away the excess paper, 1cm from the outer edge of the
pattern;
- pressed the pattern down again, especially along the edges, to
ensure it's tightly glued.
All this took about 5 hours from start to finish. I used two
medium (270g) containers of Super-77, although I probably could have
gotten by with just one large one. Towards the end, I put a lot on
the hardboard; this ensures a good bond, but on the downside it can
get stuck to the guide on the jigsaw and cause a gluey mess stuck
there (in one case it ripped the edge of one of the patterns).
The Super-77 is pretty forgiving, although it sets up quickly.
Getting a good bond (especially if you're being stingy) has to happen
pretty quickly, within 20 seconds. You can the pattern off and
reposition it, but you have to do this quickly.
Stations
posted 2003 Sep 20
Well, I spent some time and pulled measurements from the plans
(have to do something to pass the time until we move and I can
actually start construction).
I bought 3 sheets of 18x24 vellum. I drew a line down the left
side of one of them, 1cm from the edge, and a waterline 20cm up from
the bottom. From these two lines, I carefully plotted a 10 cm x 10 cm
grid; along the 10cm lines I put a dot down every 2 cm. I then
stacked all the vellum on top of each other and used a pin to transfer
the points through to the other sheets (but didn't bother marking
them). Align the dots together and tape the three sheets together
vertically.
Now put the vellum down on a pattern, and line up the centerline
and the waterline. Using the 2cm dots to ensure the ruler is
straight, move 2 cm from the centerline or waterline each time and
move your ruler down first parallel to the waterline, then parallel to
the centerline. Measure the distance from the reference line to the
intersection of the hull line.
The results are pretty to look at, but
probably not terribly useful. Because the allowed margin of error is
¼”, there is likely enough error in my measurements and
the resulting numbers that you couldn't build a compliant boat from
the numbers. Bram's patterns converted to metric have precision to
four decimal places, 100x more accurate than these.
Measurements
posted 2003 Sep 10
Bram posted a while back that he had tried to use Kinko's large
poster copier to make copies of the plans, and that the results had
been less than satisfactory. The copies had come out by up to 1/4"
off. I've already been down there to make copies of the plans (just
before his post, actually) and thus I figured I would measure the
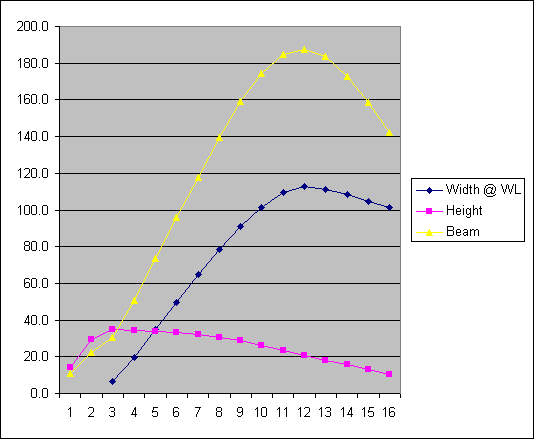
originals to see what the copies are up to. Here are the results (all
measurements in centimetres):
| Original |
|
Copy |
|
Difference |
| Station | Width @ WL | Height | Beam |
|---|
| 0 | | 14.4 | 11.1 |
| 1/2 | | 29.6 | 22.1 |
| 1 | 6.8 | 34.9 | 30.6 |
| 2 | 19.8 | 34.3 | 50.8 |
| 3 | 34.7 | 33.7 | 73.6 |
| 4 | 49.6 | 33.5 | 95.8 |
| 5 | 64.7 | 32.4 | 117.9 |
| 6 | 78.4 | 30.7 | 139.5 |
| 7 | 91.0 | 28.9 | 159.2 |
| 8 | 101.3 | 26.1 | 174.3 |
| 9 | 109.7 | 23.3 | 184.5 |
| 10 | 112.6 | 20.7 | 187.6 |
| 11 | 111.1 | 17.9 | 183.5 |
| 12 | 108.3 | 15.7 | 172.5 |
| 13 | 104.9 | 13.1 | 158.4 |
| 14 | 101.5 | 10.6 | 142.0 |
| |
| Station | Width @ WL | Height | Beam |
|---|
| 0 | | 14.5 | 11.3 |
| 1/2 | | 29.7 | 22.2 |
| 1 | 6.8 | 35.0 | 30.7 |
| 2 | 19.9 | 34.3 | 51.0 |
| 3 | 34.8 | 33.8 | 74.2 |
| 4 | 49.8 | 33.5 | 96.4 |
| 5 | 65.0 | 32.4 | 118.3 |
| 6 | 78.7 | 30.7 | 140.3 |
| 7 | 91.3 | 28.9 | 160.2 |
| 8 | 101.9 | 26.1 | 175.0 |
| 9 | 110.1 | 23.3 | 185.4 |
| 10 | 113.2 | 20.7 | 188.5 |
| 11 | 111.5 | 17.9 | 184.4 |
| 12 | 108.8 | 15.7 | 173.5 |
| 13 | 105.3 | 13.3 | 159.2 |
| 14 | 101.9 | 10.6 | 142.7 |
| |
| | | |
|---|
| 0.0 | 0.1 | 0.2 |
| 0.0 | 0.1 | 0.1 |
| 0.0 | 0.1 | 0.1 |
| 0.1 | 0.0 | 0.2 |
| 0.1 | 0.1 | 0.6 |
| 0.2 | 0.0 | 0.6 |
| 0.3 | 0.0 | 0.4 |
| 0.3 | 0.0 | 0.8 |
| 0.3 | 0.0 | 1.0 |
| 0.6 | 0.0 | 0.7 |
| 0.4 | 0.0 | 0.9 |
| 0.6 | 0.0 | 0.9 |
| 0.4 | 0.0 | 0.9 |
| 0.5 | 0.0 | 1.0 |
| 0.4 | 0.2 | 0.8 |
| 0.4 | 0.0 | 0.7 |
|
Pity. It looks like the Kinko's poster copier is out about 1 cm in
200 (about 0.5%), and it adds width, not height. The errors are all
quite consistent, right between 0.4% and 0.6%. Since the class only
allows an error of 1/4", this won't cut it. A $50 photocopy job
rendered useless.
What I plan to do is create my own lofting sheet from the plans,
and use the masters for the templates and station molds.
Note that point '2' on this graph is really station 1/2, so the
slight deviation from a nice curve makes sense, since if it was
correctly placed the graph would be smoother.
My number
posted 2003 Sep 1
Bram has posted sail numbers. I am USA 012.
Page 59 of 62
« First
…
«
57
58
59
60
61
»
…
Last »