Updated materials
posted 2003 Oct 29
Materials I'll need from John R. Sweet. The first section is all
the materials from Bram's Swift
materials list. The second section is stuff I also will use.
Everything apparently comes shipped on separate spools.
[Update 2006 Nov 9: see also my
updated comment here.]
| Qty | Description | URL | Info | Price | Total |
| 2 | 2 - 4.35 gallon containers West System epoxy (4.35 gal = 16.47L) | go | 105-C | 228.00 | 456.00 |
| 2 | 2 cans - 205-B hardener (27 oz = 0.86 qt = 0.80L) | go | 205-B | 24.00 | 48.00 |
| 2 | 2 cans - 206-B hardener (27 oz = 0.86 qt = 0.80L) | go | 206-B | 24.00 | 48.00 |
| 1 | 1 can - 207-SB special coating hardener (42 oz = 1.32 qt = 1.24L) | go | 207-SB | 46.00 | 46.00 |
| 1 | dispensing pumps for epoxy and hardener | go | 300 | 9.00 | 9.00 |
| 1 | 1 large container (20 oz) WEST 403 microfibers | go | 403-B | 15.00 | 15.00 |
| 1 | 1 large container (12 oz) WEST 407 filler | go | 407-B | 10.00 | 10.00 |
| 1 | 1 large container (6.0 oz) WEST 406 colidial silica | go | 406-B | 8.00 | 8.00 |
| 1 | 4” plastic spreader (dozen) | go | | 4.00 | 4.00 |
| | 2 dozen 2” disposable paint brushes | | | 12.00 | 12.00 |
| | 2 dozen 1” disposable paint brushes | | | 12.00 | 12.00 |
| 1 | 100 mixing sticks | go | | 1.00 | 1.00 |
| 2 | 2 / 50 yard rolls 1” e-glass tape | go | | 9.00 | 18.00 |
| 2 | 2 / 50 yard rolls 2” e-glass tape | go | | 15.00 | 30.00 |
| 10 | 10 yards 10 oz e-glass for cradle | go | weave 1800-60" | 7.40 | 74.00 |
| 20 | 20 yards 50” wide 9oz. S-glass 8 harness satin weave
20 yards 50” wide 6oz.
(see here) S-glass 8 harness satin weave | go | weave 6580-50" | 7.50 | 160.00 |
| 24 | 24 yards 50” wide 5.5 oz. carbon/Kevlar hybrid twill | go | weave 94905-50" | 21.00 | 504.00 |
| 1 | 1 / 50 yard roll 2” uni-directional carbon tape (for hull, deck and rudder stock) | go | | 70.00 | 70.00 |
Other materials I'll need |
| 1 | Blue nitrile gloves: M, L, XL, box of 100 | go | | 11.00 | |
| 1 | MSA Ultra-Twin full-face respirator | go | | 75.00 | |
| 1 | #9441, 9½” bent shear sharpened for Kevlar | go | | 11.00 | |
| 1 | 1 large container (12 oz) WEST 423 graphite powder | go | 423 | 10.00 | |
Possible stuff for later |
| 5 | Tyvek suits | go | | 5.00 | |
| 1 | Grooved aluminum roller, 1” x 3” length, straight cylinder | go | | 8.00 | |
| 1 | 10 plastic squeegees, 6” wide, one dozen | go | | 8.00 | |
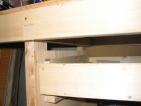
Benchbuilding
posted 2003 Oct 28
I've been building my bench
over the past few weeks, and it's great fun. I've been cutting,
drilling, gluing, screwing and sanding. I'm having a blast. The instructions are very easy to follow,
you only need a saw, drill and screwdriver to build it (no router,
like Max's bench would have required), and it's heavy and built like a
tank. The bench top is two laminated sheets of 3/4" ply which you can
ding up and replace when needed.
Other bits and pieces:
Imperial sucks. Here's some translations for you imperial
challenged:
1 quart = 32 fluid oz
1 gallon = 4 quarts
1 pint = 2 cups
1 quart = 2 pints
I've measured the garage bay, it is 10 feet wide, 15 feet deep.
The ceilings are 10 feet high. 1500 cubic feet. From that space,
it is 23 feet to the door. It will be tight but doable.
On the list, Bram mentioned a few important things:
- (link)
You need a 12 oz can of West
423 Graphite Powder, for the underside of the hull
- (link)
The vang pedestal base has a top diameter of 2" and bottom
diameter of 3".
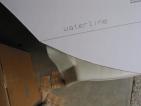
- (link)
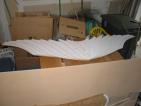
The cradle frames sit on stations 6 and 10. It helps to let the
glass hang over the front of station 6 a little more (it is not quite
centered on the cradle frame by about 2 inches--you can see what I
mean in the picture on page 58).
- (link)
The big holes in the bulkheads are 3 1/2 inch diameter and the
small ones are 2 1/4. Be sure to seal the edges of the holes.
- (link)
The orientation of the hybrid on the bulkhead material is not
critical but it would be better if the carbon ran with the length
of the strips (vertically).
- (link)
I just weighed the station 6 bulkhead completed for USA 013. It
weighs 1002 grams with all hybrid and epoxy applied.
- (link)
...your plans will not include a transom bar pattern as indicated
in the manual. The transom bar is a simple 72" radius. I
decided some time ago not include a pattern for it as it is an
additional sheet that is simple to cut. The jig ends up being a
piece of 2x6 48" inches long. If you drive a nail in the center
of one of your sheets of particle board two feet from one end, you
can tack the 48" 2x6 parallel and flush with the other end and use
a string to strike the radius. (Here, the 2x6 will be lying on
top of the 4x8 sheet, with one long edge flush against the short
edge of the 4x8.)
There's an interesting site which came up on the list about
building
kayaks.
There's another site which talks about sailers on Lake Sammamish; I guess
they just held a regatta a few weeks ago. Sounds like fun.
There is a page here
which talks about the hazards of a number of woods and how you are
sensitized to them.
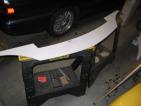
Sanding done!
posted 2003 Oct 15
Finally, I completed the sanding of all the station templates. I
asked the list if I should cut out the holes from the hardboard for
the strongback, and Greg indicated it probably wasn't worth it.
Instead, I'll drill holes at the corners and on the c/l and w/l, and
use either a mechanical pencil or a punch to mark the right spots on
the particle board.
Each station took around a half hour, and having exactly 1 mm to
sand off made things fast. ;-) By the end I'd started using a dust
mask again and brushing off the dust with my brush. Not quite as easy
to work, but safer, I'm sure.
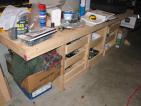
Workbenches
posted 2003 Oct 14
Max and I got into a conversation about workbenches, and convinced
me a I really needed one, and after thinking about my workflow for the
cutting and sanding, he's right (it would have been very nice to clamp
those hardboard station molds down to a bench in order to sand them).
It turns out that benches are somewhat of a cottage industry in the
world of woodworking. There are the very fancy
ones (to me, anyway) and the very basic
ones.
I found plans I like here (has
a shelf and a couple of drawers, which seems like a good compromise).
This site has the
same plans for cheaper (you download a pdf) and a number of other
bench plans. Popular Mechanics (!) has a well
illustrated set of plans for a simple bench. There's a list of
more here.
This is the bench
Max built, with some commentary so I can figure it out myself:
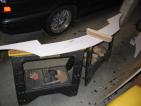
More sanding of station templates
posted 2003 Oct 12
I realised a few things this weekend:
- Sandpaper does get dull, and it gets dull fast. It cuts pretty
fast when it's sharp. It's like it has a built-in system to control
how quickly you remove material.
- The best edges to sand were the later ones, mostly because by then
I was using a lot of adhesive to glue the paper down. That was a good
idea. The early stations the patterns separate from the hardboard a
bit around the edge, which makes it much harder to sand things down.
- It's much easier to sand with the straight edge than the curved
edge of the sanding block (and forget about putting the sand paper
into the slots in the block; when you're changing it every 10 minutes,
it's just not worth it). The convex curves were easy to sand down,
because the straight edge was usable. The concave ones took more time,
especially for the stations close to the bow, where the curves are
sharp. For the more gradual concave curves, the straight edge was
still faster.
- When cutting out the templates from the hardboard, a millimeter is
about as much as required outside the line, you can take that out
quickly.
- The steps are tricky, and you really need a file to get the edges
sanded down enough. The sanding block either takes out too much
(usually on the side opposite where you're working) or can't get in
close enough to the corner.
- Wood dust gets all over. Ugh.
Sanding station templates
posted 2003 Oct 10
Next up is to sand the station templates down to the pattern lines.
60-grit is plenty good enough for this, and you'll need a bunch of it;
one sheet of 8x10 will do a single large station.
Page 58 of 62
« First
…
«
56
57
58
59
60
»
…
Last »