Building the little bits
posted 2004 Jan 29
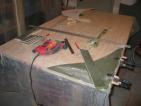
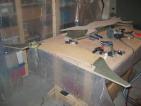
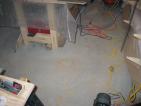
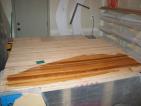
Started building the "little bits" - the centre control block
bevels and the rudder gudgeons, while at the same time completing the
T's on the soldiers, and gluing together the transom.
The "little bits" should probably be glued together with epoxy
and colloidal silica (406), or even something like Tite-Bond (a
waterproof wood glue), but I used plain glue and will be sure to seal
the holes I drill with epoxy (which I would do anyway). With the
small boards glued up, I would take all the staples out of one piece,
then put it end-on-end with another one still stapled down, and use
that to stop it from moving while I scraped and planed it. With the
sander, you can just hold the piece still and move the sander around
to hit all the high spots. Then, I used a paintbrush to paint on a
sealer coat of epoxy on both sides of the small boards.
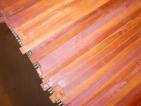
While doing this, I started to build the T's onto the soldiers.
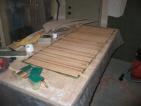
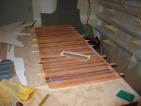
I removed the cove on a number of strips, and stapled them down to the
table top; make sure to tap the staples flush with the strips, since
the staples are staying in there, and having them flush will make a
smoother fillet. I then mixed up a thin epoxy/406 mixture (molasses,
say) and ran a blob down the middle of the gap, to bond the T to the
soldier. I then added more 406 into the mix (to peanut butter) and
added fillets to either side of the soldier. I made the fillets by
holding a mixer stick (a tongue depressor) at about 15° off
straight out, so there's enough there to create a good bond.
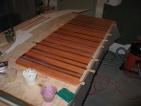
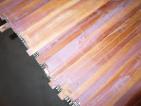
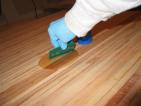
Once the fillet is in place, remove the excess on either side with
a squeegee, and cut 1" fibreglass tape to length. Push the tape on so
that it sticks to the fillet, and make sure there are no air holes
underneath. Then apply straight epoxy to the tape, and work the tape
flush to the soldier and the T with a gloved finger. If you have any
excess straight epoxy, seal the top edge of the T soldier.
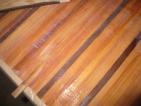
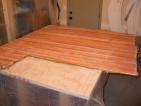
Gluing the strips together for the transom was easy. The only
thing I did was trace around the bulkhead at a few spots where the
chine or deck was, so that I could position the white cedar accent
strips in the overall sheet where I wanted them. This way, the right
number of strips above and below the white cedar are in place, so I
know exactly where the white cedar will appear vertically on the
transom.
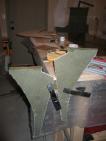
Cutting the new station 6
posted 2004 Jan 25
I decided that since I could, I might as well put the carbon tape
on the bulkheads while I could still get a chemical bond. I managed
to get it on there a bit late - the surface would ding with a
thumbnail but it was beyond what I would call "tack free", and there
was a slight layer of amine blush. I did it anyway. I'm not building
again, though.
I then flipped the board and repeated the process: sealer coat,
fairing, sanding, hybrid, epoxying. I cleaned the amine blush from
both sides, and then rough cut out the bottom edge of the bulkhead;
this was to make sure that I could make soldier boards as long as
possible. I routed out the station, took off the extra 1/8" at the
top, and all was done.
All I need to do now is cut the holes in the new station and put
the second side of the tape down. I'm nervous about all that. I did
check how much room was available for the large holes, and there's
plenty of material to allow for 4" of space between them.
Glassing and fairing the new station 6
posted 2004 Jan 21
Just some quick pictures showing the progress of the new station
6. I coated the first side with a sealer coat of epoxy, sanded it
down a bit, then flipped it over and started working on the other
side. Scraped (harder here because the glue had cured solid), planed,
sanded, laid out the hybrid and smoothed it down, epoxied and then
filled out the epoxy. All looks well.
Building another Station 6
posted 2004 Jan 18
I put carbon tape down on the station 6 I botched, mostly because
I was still in mourning. I didn't sleep well for two nights and
decided that the only way to be able to get more (better) sleep was to
build another one.
I suppose the good thing about building another station bulkhead
is that it flies right by, and I know exactly what to do. Because
it's smaller, it take less effort to sand down. And I can do a couple
extra things to ensure it works perfectly. New things I've found:
- Be minimal with glue, but it's still hard to be perfect. The
beads and coves vary enough that a perfect glue line on one strip
doesn't work for the next one.
- It makes a world of difference to scrape the excess glue off
before it's cured. This is especially important on the exterior,
where the surface fairness and look is important. I found that
one side I scraped early looks very nice, and the other side where
the glue had hardened took a lot more work and isn't as polished.
- Keep your scraper sharp. On the second side, I created a
number of rough spots while trying to remove hardened glue. For
the inside, don't bother scraping too much.
- There was a comment in one of the books that you have to sand
every spot you planed, because after planing you can see if you
haven't hit it with the sander. This is true - you can see that a
planed spot reflects light a bit differently immediately after
being planed.
- I used the plane to knock off the edges that seem to be higher
along the cove side. Touch every part of the strip once with the
plane.
Also notice how I have longer strips every 10th strip or so -
this was a byproduct of the length of the full strip, but it has other
uses. You can put one at dead-on centre, and have it hang out the
edge of the hybrid - this way, you can line bulkhead centrelines up
exactly to the bead side of the strip. Having a number of these long
strips means you can staple the ends down to the workbench and not
worry about getting staple bits in your finished bulkhead.
I've got enough scrap bulkhead material from my first sheet to be
able to create some of the soldiers. So, while the new bulkhead epoxy
is curing, I have been building the T-soldiers for station 2. Notes:
- When you staple the cedar to your workbench, tap the staples
down so they're flush (since they won't be removed)
- Be sure to rough up the edge of the soldier that will have the
fillet applied with 60-grit, to get a good mechanical bond.
- I put a line of epoxy mixed with 406 (colloidal silica) light
cream consistency between the two cedar strips, so the soldier is
bonded to the cedar strips as well as having the fillet.
Also - I weighed the busted station 6 with 1 of 2 sides of tape
applied, and it came out to 1230 grams. Bram's station 6 is 1006.
224 extra grams... hm.
Station 6 is cursed
posted 2004 Jan 17
Station 6 is cursed.
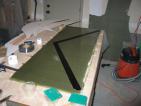
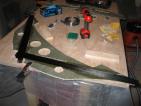
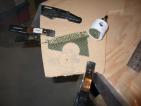
Next up is to cut the lightning holes in stations 6 and 8. There
aren't any real locations specified in the instruction manual - just a
picture of station 6 on page 18. Using a width I knew (the width of
the carbon tape) I could figure out the locations of all the other
holes on the bulkhead. I just forgot that the centreboard trunk had
changed.
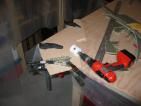
Cutting the holes is pretty simple. Figure out where you're
going to drill. Pound a small starter hole with a nail. Then use a
drill adaptor that turns your drill into a big circle-cutter (look at
the pictures). I found my cordless worked for the smaller holes, but
for the larger ones I really needed a corded drill. Even then I had
to go slowly, it took a while to cut away enough material to bore
through the bulkhead material.
I located the holes as follows:
- Drainage holes, 2 1/2" along bottom edge of bulkhead from
centreline, and up 3/8" (calculated) - 2 1/4" diameter
- Small lightning holes, 3 5/8" in from the chine, 1" up from
the waterline (calculated) - 2 1/4" diameter
- Large lightning holes, 2 3/4" out from centreline, and 2 1/8"
up from waterline (calculated) - 3 1/2" diameter. Don't do
this!
Having cut those holes out, I called Bram to figure out where the
holes should be cut for station 8. Glad I called - they are a
different pattern than station 6 (four large holes instead of 2 large
2 small), and they are positioned differently.
When we got to talking about station 6, things got worse. The
drainage holes should work out ok. But because the new centreboard
trunk is 2" wide, the large lightning holes in station 6 should be at
least 4" from edge to edge - I cut them 2".
Damn.
Given that this station is where the mast enters the hull, it
sees a *lot* of stress. So working with very fine tolerances isn't a
great idea. Damndamn.
For station 8 (pictured on page 63), there are four large (3
1/2") lightning holes. They are centred top-to-bottom on the
bulkhead. The edge of the first holes are 5" from the centreline.
Edge to edge, the next holes are 4" further out. I cut mine 3"
edge-to-edge, but given that these are primarily for ventilation, I'm
less concerned about this mistake. Also, there's no need for carbon
tape on station 8, since it's not taking the load of the mast.
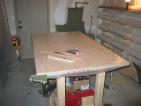
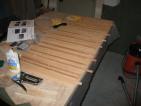
Routing out the bulkheads
posted 2004 Jan 15
Next up was routing the bulkheads. This went pretty quickly.
With the patterns already rough cut, I clamped them to the paper side
of the pattern, then routed around the pattern. With that complete, I
slid them up 1/8" so the top edge (the deck edge) had 1/8" showing,
and routed that off. Bram suggested 1/4" but given that
I'm routing everything I know I'm pretty accurate. In email, Bram
said 1/8" was fine (and that the bulkheads are easy to sand, to boot).
I made a small, 1/8" mistake on station 6, but I don't think it
will matter - I cut in a bit too far. I think I'm fine, though, epoxy
will fill up that space anyway. That's the second station 6 pattern
I've mangled. It must be cursed.
The router is messy - the wood makes sawdust, the kevlar turns
into long stringy fibres (and wraps itself around the router bit,
which isn't good), and the carbon makes a fine, powdery black dust.
Not only that, something in the bulkhead material burns, so there's a
smoky haze in the work area to boot. I found that the sawdust would
get stuck in the hole left by the router bit, and I would have to stop
periodically and clean it out - having it clean helped reduce the
smoke. Doing the rough-cut close to the pattern line helps keep the
mess (and smoke) down.
The resulting bulkheads have small "tufts" of kevlar along the
edges - I'll have to cover over these when I seal the edges.
Measuring and cutting
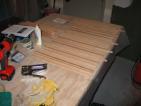
posted 2004 Jan 11
When cutting the bulkheads, it's important that the strips run
vertically. To ensure that I could make the bulkhead as accurately
vertical as possible, before I covered up the second side of the
bulkhead board with hybrid, I marked both ends of a few strips with
identifying marks (/, //, or ///). I marked every fifth one, so I
knew I could find one in the middle.
Then, with the hybrid on there, I found two of the same mark, and
ran a piece of string along the bead edge of the strip. Thus the
string is running exactly vertically. I then put a straight edge
along it, and marked a red line. I repeated this for another strip
five strips down. With these lines, I now have two "primary sources"
to determine if something is aligned with the vertical strips. It's
important that these are straight and accurate, since all the
other lines are going to be pulled from them.
Then I aligned the bulkhead patterns on the bulkhead material.
- I roughly aligned the bulkhead so that it completely fits on
the bulkhead material and no parts are hanging off. I did this for
all the patterns, and made them come within a couple millimetres of
each other - I want this bulkhead material to go as far as possible.
(The centreboard trunk will be built with it, I need some left over.)
- Using my carpenter's square and straight edge, I ensured that
the waterline on the template was exactly 90° to the
primary-source red line.
- I marked a line around the template with a pencil (I could
have scribed with an awl) so that the outline of the pattern is
transferred to the material.
- So it would be easier to see where to cut, I drew "cut lines"
in red sharpie between the different pattern outlines.
- I pulled out my trusty Skil jigsaw and cut out rough-shapes -
not the final exact shape, just the rough shape. I'll come back later
with the pattern and the router, and rout down to the exact pattern
shape.
Next up: routing out the patterns themselves.
I always live in fear of making mistakes on steps like this.
Destructive steps are no fun. Measure three times is my motto.
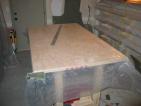
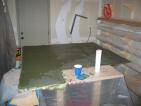
Epoxying side 2
posted 2004 Jan 7
So, with a snow day upon
us, I decided to do the big timed-epoxy job and cover the second side
of the bulkhead material.
After sanding it down a bit with 60-grit to get some tooth on the
epoxy, I laid out the hybrid. This time I used a paintbrush to smooth
it down, this works a lot better (fewer snags). Next, I prepped the
epoxy by filling five mixing cups with 8 squirts of resin. I wound up
using more than five cups (maybe 8 or 9).
I put the mixing cups in front of my space heater, which didn't
seem to heat them up much, but apparently it did some good because the
epoxy did kick off a lot faster (remember, it's -10°C outside at
this point). Then I worked it all in - it took about an hour to get
the entire surface wet out and filled. Another half hour was spent
filling the starved spots and pulling out what extra I could. (The
space heater idea was something that came from Gougeon's Cold
temperature epoxy handling information. I tried keeping the resin
inside the house, but that didn't seem to make much difference.)
One of the books talks about spreading this epoxy quickly and not
working it into the surface, because the epoxy will get small
micro-bubbles which reduces it's strength. This is certainly true -
the mixed epoxy has a solid golden colour, while the epoxy pulled off
is white. Something's in there.
Eight long hours later, with the epoxy just about tack-free, I
came back and applied the filler coat. This time, I used only
four-squirt cups of epoxy, and found that I needed four or five of
them. It probably would have been faster just to use 8-squirt cups.
In a conversation with Bram, this is normally applied with a
brush - this is also what the West instructions for applying
woven cloth & tape say to do. I used a squeegee. Seemed to
still work out fine; the important part is to ensure there are no
spots where water could accumulate.
Cleaning amine blush, fairing (again)
posted 2004 Jan 5
The second coat of epoxy filled in the divits quite nicely, now
there are only some small bumps on the finished surface. I'm not sure
where they came from - it doesn't look like outgassing, maybe trapped
air? - but they don't seem critical so I'm leaving them alone.
One thing to remember is that after you've sanded and faired, and
are ready to glass, remove the staples holding the board to the
workbench. I didn't. I remembered right when the glass was wet and
tried to remove one, and it was nasty, so I left two others in. When
I flipped the board over, I used wire clippers to clip off the ends of
the staple. Be sure to wear eye protection for this, and use a gloved
hand to stop the little buggers from flying away. I also put a circle
around the ends, so I could transfer it to the other side and avoid
that spot. (However, when you start sanding this side again, you
staple it down, and that creates holes on the finished side anyway -
and thus you know where the unremoved staple heads are.)
I found that there was a thin, waxy/oily film on the glassed
surface - amine blush (not surprising, it's cool and humid at the
moment). Amine is water soluble, so I used water, a rag (an old
sock!), a Scotch-Brite pad, and paper towels to get rid of it. Start
out by putting a thin layer of water on the area to clean - the water
should sheet, not be little drops. Scrub hard with the Scotch-Brite
pad, and then mop it up with the paper towels. You should see the
water turn whitish. If your scotch-brite pad gets white, you're not
using enough water.
Next, since this was side 1 (the side that was more difficult to
fair), I went at it again with my block sander to try and knock off
some more. I made a bunch of dust, then cleaned that up with the
random orbital sander, and removed as much dust as possible with the
vacuum. I then mixed up some more fairing compound and faired the
surface again to try and reduce the variations on the edges.
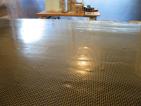
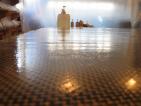
Wetting out the hybrid
posted 2004 Jan 3
Well, I did all the work to get the hybrid on to the "flipped"
side.
First was scraping, sanding and fairing, as described below.
Didn't have to do much here, compared to the other side.
Next, I applied a sealer coat of straight epoxy. This went quickly
- I needed about four 4-squirt cups of epoxy to cover the entire
surface. I went for a very thin layer, just barely covering the
surface - no need to add extra epoxy weight if it isn't necessary.
The entire thing took about 40 minutes.
About three hours later, while the sealer coat was still quite
tacky (perhaps too tacky), I came back and applied the fairing
compound. I needed substantially less fairing putty than for the last
side, partly because it was smoother and partly because it had the
sealer coat. I also didn't scrape it over the entire surface, only
the bits that needed it.
The next day, I came back and sanded everything down with my
sanding block. I scratched things up a lot (important so the next
layer will have something to key into), and then moved on to the
random orbital sander. The RO sander is good for sucking up the
remains of the sanding dust, but again it doesn't remove material
nearly as quickly as sanding by hand.
Next, I pulled out the hybrid and laid it out.
This hybrid drapes very easily, and because it's a twill pattern you
have to be very careful not to catch it on edges as you're adjusting
it, or having it catch on your hand as you are smoothing it out. I
put a couple snags in while setting it up. I used a wallpaper brush
to smooth it down (not a good choice - a clean paintbrush would have
worked better). You also have to be careful about ensuring that no
loose strands of kevlar or carbon get onto the surface - they soak up
resin and add no strength.
With the hybrid laid out and smoothed down, I wetted it out. This
took a good deal more epoxy than I had originally expected - maybe 10
to 12 8-squirt cups. I poured my first blob in the middle of the
sheet, and pulled it out to the edges with the squeegee at about 45
degrees. I found that I would start with the squeegee at a sharp
(90°) angle, and as I pulled the resin out would reduce the
angle down to 45° - this pulled lots of resin from the middle
and seemed to lay it out fairly evenly throughout the pull. I was
also careful to always dump the newly mixed resin on to an already wet
portion of the hybrid, and then work it into the dry areas.
Sea Kayak has a good description of how the glass should
look when it's correctly wetted out (and it applies to the hybrid just
as much): “The cloth should appear wet by not glossy. You don't want
the glass floating in resin, you want it tight to the wood.”
With the entire surface wetted out, I went back with an aluminum
fibreglass roller and tried to roll out some of the air bubbles -
these look like small dime-sized mounds when you look along the
surface of the hybrid. The roller worked moderately well, and did
push the hybrid down on to the wood strips, but I found that pushing
the bubbles with a gloved finger also got rid of them - you could hear
the small "whoosh" when the air escaped.
I then started to pull off what excess resin I could. Pull off too
much and the hybrid would look starved (dry), pull off too little and
it would look very shiny with little of the texture of the fabric
showing through. There wasn't much extra there - I found that despite
how much I had dumped on, I couldn't pull much excess off.
About 8 hours later, the epoxy had become tack-free but not
completely solid (this took a while because of the cold temperatures
in my work area). At this point I applied a second coat of straight
epoxy to fill the divits in the glass. This needed a lot *less* epoxy
than I expected - I mixed up two 8-squirt batches, and all I really
needed was probably three 3- or 4-squirt batches. Take care with this
application to not put too much extra on.
I spread the epoxy out with my squeegee, but even better would have
been to have a roller. Sea Kayak says “Apply an even
coat of resin with a paint roller. To remove any surface bubbles on
the resin, "tip off" this fill coat by wiping the surface with a dry
foam brush, or a section of paint roller stapled to a stick.”
Bram indicates in email that a brush is used for the second coat,
and the Epoxyworks
instructions suggest a brush:
On a horizontal surface or on the inside, it is possible to pour a
small puddle of resin on the surface and then spread it around with
the squeegee. The technique that works for me on the outside is to use
the brush to transfer the resin from the container to the hull. Since
the brush is depositing more resin than is necessary to fill the
weave, only spread the resin about 1/3 of the way down from the
centreline. This should be just enough resin to fill the weave all the
way down to the sheer line.
The first time over, concentrate more on filling the weave than making
it look good. Work the resin aggressively enough to force the trapped
air out of the craters in the weave.
After roughly spreading each batch, go back over the section
systematically, scraping off and disposing of the excess resin.
Use a steeper angle and slightly more pressure on the squeegee this
time to force the air out and to level the surface.
The part that is most likely to get missed is the vertical surface
along the sheer line. Check for dull patches that would indicate an
area that has been missed. It is hard to see on the vertical surface
so check from all angles.
Listen to the squeegee. As it passes over a dry patch, you will hear a
harsher sound.
Page 55 of 62
« First
…
«
53
54
55
56
57
»
…
Last »