Even more stripping
posted 2005 Jan 31
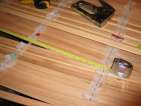
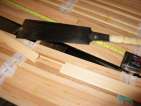
All that remains in the bulk of the deck is the key strips. Shaping these isn't too hard, you just have to be careful to go slowly. Cut the strip to 2" longer than the hole, then place the strip so one end is where it should finish in the hole. Mark the strip at the maximum width of the hole, then hit it with the plane, repeatedly checking for fit. When you get close, one pull of the plane will make a big difference - so go slow. Also be sure to keep the plane at right angles to the surface of the strip. When one side fits, cut the strip to length and plane down the other side.
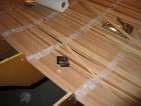
Once the key strips were done, I moved on to the short pieces in front of the step at station 6. I did these in two batches of six strips each time, because I wanted the glue to dry between batches. Each strip installed out here has to be taped down to the adjacent strip, and at the station 6 edge that means that there is tape between the strips. After installing a batch of 6, I came back and cut the tape on the top edge where it disappeared between the strips, and pulled the tape down out from between the strips (so the bottom edge of the cove is ruined instead of the top edge). Because no glue is holding the strips together at this point, it's not as strong, but the strips are running long and I figure this area will be cut off anyway when I install the step.
Next up: sanding. I removed the staples between stations 8 and 13 (pliers seemed to work well this time) and began scraping and planing down the high spots. I have to say, next time I do this, I'll be sure to remove all the excess glue I can during the strip installation phase - it's a lot harder to remove the glue afterwards.
For a diversion, I installed the vertical part of the step. I planed one edge off the cove of a strip 103" long. The edge with the cove remaining will fit into the gap between the strongback and the bead of the strip pressed up against the step. I installed that strip, then went ahead and installed the other three to make up the step - it's worth doing all four at once, so all four will press the strips down into the deck and make a tighter bond.
| (20 images) | |||
|