Glassing the deck
posted 2005 Jun 12
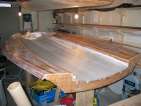
Time to bite the bullet and do the final large area of glassing (that's visible, anyway).
I unrolled my roll of s-glass to discover that all that remains is only enough to cover up to about 20 inches back from the bow. I don't really want to buy more just to cover this area, so I used some scrap from glassing the hull, and made the seam lie under where the launcher throat will go - this should be pretty unobtrusive. The sheet also didn't go quite to the gunwales just in front of the step, so I added in a second piece there.
The overlap at the bow was only 1" - in retrospect I should have made it two, the bow piece of glass pulled slightly forward during the glassing process.
Then, armed with seven 10-squirt cups of resin, I started. It took around an hour to get everything wet out, and then another hour working out all the bubbles I could find. Tips:
- Use 206 hardener regardless of the temperature, you'll need the time
- Start in the middle and work to the edges
- Always keep a wet edge (indeed, pour the epoxy onto a wet area and drag it to the dry area - this way the air bubbles are worked out as you go)
- Wet everything out and then come back and remove the excess (I did both as I went, pretty much)
- Pour all the epoxy gradually, allowing time for it to soak in, not all at once. I did a big pour with the first cup, and this caused a bunch of air to be trapped under the glass. I then spent a bunch of time trying to remove bubbles.
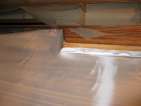
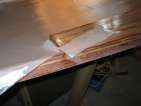
I wound up coming back with a pin and using that to work out bubbles I found - and there were a bunch. I guess my epoxy application technique still needs some work.
Overall, however, the glassing job looks good and I'm pretty happy with it.
Next up was coat number 2 - this time with 207 hardener. I used a West foam roller for this coat, the first time I had used one of these. These rollers give a *very* thin coat - I wound up having to come back in some spots with a brush and fill in areas where the roller hadn't filled in the weave.
And coat three, with a regular roller.
Now that all that is done, I trimmed the trailing edge from the deck (the final trim is done once the deck and hull are mated). The trick here: don't push up against station 14 with the saw, especially at the wingtips, or you will cut off too much (oops).
And then I aligned and trimmed the transom bar in preparation for bonding. Just make sure it is centred and perfectly vertical.
[Update 2007 Jul 19: As it happens, the "coming back with a pin and using that to work out bubbles I found" step resulted in an area on the deck which is white, because the epoxy was overworked and turned cloudy. Sigh. When applying the epoxy, you really have two passes over it: squeegee in, and remove excess. Anything more will cause the clouds.]
| (26 images) | |||
|