catzooks.com


Rigging the mast, centreboard inserts


posted 2007 November 26

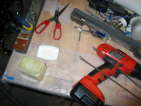
Two main tasks this week: bonding the threaded inserts into the centreboard insert blocks, and drilling holes in the mast.

While bonding the threaded inserts in place, I wanted to make absolutely certain that the blocks didn't bond to the hull and that the rods didn't bond to the blocks. To do this, I rolled the ends of the rods in vaseline, then screwed them into the inserts, and put a dab of vaseline in the end of the insert. Then make sure that there is a think layer protecting the rod above the insert.

Next I mixed the epoxy and coated the interior of the holes in the block, and added some silica and coated the inserts, and then slid the rods through a carefully cut piece of plastic with holes cut the right distance apart to match the holes, and the holes cut slightly too small - so the plastic would be tight against the rods. Then slide the rods into the tubes, pop the threaded inserts/epoxy/silica into the holes in the trunk insert, push the block into place, push the tops of the rods to ensure they're deep in the holes, and let it cure. I decided to do only two at a time - I didn't want to have to deal with four of these at once (all going off in weird angles).

Set two went the same way: coat the inserts in vaseline and coat the insides of the holes on the trunk insert, coat the tips and insert them in the plastic, put them in the tubes and press the inserts into the block, and let everything cure. I didn't have much epoxy spreadout - there probably wasn't of the epoxy/silica which reached the bottom of the hole (it would have all been pushed off when I inserted it in the hole), but there was enough to hold the metal inserts in place, which is what counts.

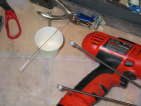
Since I had a bit of excess epoxy from this, I also made a make a fibreglass tube for the 1/4” primaries bolt which goes through the mast. This is supposed to be 10-12mm when complete. I sanded down a thick drinking straw and wrapped it around that; the end of the straw helped twist the wet glass together, the system worked pretty well. Once cured, drill out the core.

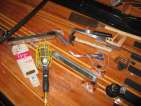
For the drilling the holes in the mast part, I drilled two. The first was the hole for the t-ball insert. I drilled the hole, then reamed it out with the dremel. (This is - apparently - the right way to go about it - drilling the exact size hole isn't good, because the drill causes carbon on the inside of the mast to shred away.) To get the exact size, I used a rat-tail file to work my way up to the right size.

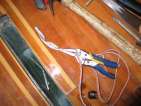
Once the hole was the correct side (the flares of the backing plate fit into it nicely), I slid a wire down the top of the mast and through the hole, slid the backing plate on, bent a loop in the end, and screwed a screw into the loop. Then pull it through the mast and pull the plate up flush against the back of the mast, while riveting it in place. To hold it tight while I riveted, I clamped the wire with a vice grip and held the vice grip against the mast. To get the the wire out, I pulled it tight and then snipped off the end, so the screw just fell out the bottom of the mast.

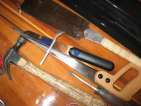
Next up was to cut the hole for the Holt-Allen HA15B sheave and install it. I did this in a manner similar to cutting the hole in the hull - measure where it should be (91 1/2” down), put the blue tape on so I knew not to go outside the lines. Drill a pilot hole, and follow with a bit of dremel work, and then file down the hole with a rat-tail file. The tendency is to cut these holes too large - and certainly it only takes a couple of swipes with the file to go from tight to loose... I wanted to ensure the fit was tight on the top edge so the rivet would have plenty of carbon to grip in, and I went from snug to very slightly loose (about 1/3 mm) in only a few strokes of the file.

Once the hole was ready, I had to file down the block itself; it was designed for a thinner mast wall, and I had to remove some of the flat. Once that was ready, rivet, and it's done.

(19 images)
img_1440 img_1441 img_1442

Replacing the trunk tubes


posted 2007 November 12

Bill sent me mail after reading my 10/29 post saying three things:

  1. Aluminium tubes will react with the SS threaded rods for your CB cassette blocks, especially in salt water. I did not use any tubes and have no trouble pushing the rods into place with my finger when installing the blocks. The threaded inserts in the lower block hold the rods in place while you line up the top block. If you want to use tubes, try some plastic plumbing tubing. Just rough up the outside surface and bond them in.
  2. Add some spacers under the vang cleat to make cleating easier by raising the line up above the toe rail. You will see what I mean the first time you try to cleat from the gunwale while under way. See the picture and add enough height to clear your rails with the line stretched tight. Bram made an extended plate for his boat to solve this problem.
  3. Check your T-nut in the cleat block with a bent paper clip to see if the threads are present. Those cleats take a high load, both in shear and lifting forces, so you need a good fastener hold-down. I hope that you find threads in there.

All good points - and so this was the week to address this feedback. (I should note that Bram says in the centreboard manual that aluminium tubing works, but I figured I would replace it anyway.) Once again, it would have been easier to do this without having the trunk bonded into the boat...

I started by removing the tubing. This took some work. First, I used my collection of saws to hack away at the plexus; a sabre saw I bought just for the purpose was the best solution to getting into the confines of the trunk. Once I'd removed enough plexus, I clamped my pliers on an edge of the tubing, and hauled. Because the aluminum would break, I had to slip the pliers down into the trunk, clamp them, clamp a rope in the jaws, and then haul on the rope. It took pretty much my full weight to pull the aluminum off. It turns out that the tensile strength of the aluminium tubing was very slightly stronger than the bond strength of the plexus to the aluminum. Thank heavens for that; I have a newfound respect for the bonding ability of plexus.

I also drilled holes in the ends of the spreaders.

Next up, I had to replace the breather tube, which I blocked up with varnish. I knocked it into the hull, drilled a 3/8” in the centre rail, and prepared the new tube. The new one is brass (from the local HobbyTown) and about the same diameter as the straw. I sanded the sides, then pushed some rolled tape into the tube to hold it in place, and used a clamp to hold on to the tape. Before inserting the tube in the hole, I fit a q-tip down in the hole and tried to get epoxy on the sides. Slather up the tube in epoxy/silica (like cream), slide in place. In retrospect, rather than coat the tube in epoxy, I should have put a light coat on it, slid it in, then filled a syringe with epoxy and pressed it into the hole. As it stands, I'm not sure how much of the hole actually got filled (probably just the very top). Once everything had cured, I sanded off the excess. I think this is done - I don't want to mess with it further.

  • Next, per Bill's suggestion, I used a paperclip with an L shape to feel for threads in the bottom of the cam cleat holes. They're there - so I figured I must have put in 1/4” tee-nuts. Not sure how *that* happened (and it happened on two of them...). So, I drilled out the cleat, countersunk it, ground a 1/4” bolt to the right length, and screwed them down. They seem to fit well; they're in there tight.

    To replace the aluminium tubing, I used (non-reactive) fibreglass tubing from my local kite store. Sand down one edge, mix up epoxy/silica, and bond in place. Once those had cured, I used a looooong drill bit, and drilled up into the top block (be sure to weight down the block on the upper side) and down into the bottom block.

    Getting closer...

    (19 images)
    img_1162 img_1163 img_1164
  • Page 9 of 62
    « First« 7 8 9 10 11 »Last »