Bought plans for the next one
posted 2006 Mar 30
I bought plans for my next boat. I'm planning on building a Sonatina,
a design by Chris Koper,
who lives in Missassaugua (Sea K Designs, #24—3265 South Millway,
Mississauga, Ontario, Canada, L5L 2R3. (905) 608-8994). I like this
boat because a) it's small - 14’6” - and still a dinghy,
b) it's simple enough I can sail it with the kids, c) it's a scow and
so is pretty stable, and d) it's made of plywood, and so a lot quicker
to build. I'm a little worried about a note that went up on the site
- the business is up for sale, due to the health of the designer. I
wound up calling him because I didn't get a response to my email, and
it turns out he has ALS. I hope there's a good support network in
Ontario (from the pictures on the site, it seems like there's a lot of
them...)
I found another design I really liked - the Mini 6.50s (Here's a link to
the class association.)
There's a race from Plymouth England to Tenerife in the Azores - and
they look like great boats. Not really weekend loungers - more like 6
meter thoroughbreds. CDK Boats
sells kits, and another designer, Dudley Dix sells both plans and
kits. (There's also West Coast Minis, a
Vancouver importer of Spanish-built ClaseZero boats.) One of the
nice things about these boats is they aren't shockingly expensive -
$40k for a decent build. I was introduced to these via Sailing World, Jan/Feb 2006
issue. I can always dream, right? (Oh, and here's a good article on how
to get started racing, just what I need.)
So now I have plans for the Sonatina,
the Blivit 13,
Northwest Marine's Delta V (based on
the NS14 class - here's an
extensive builder's
diary) and Northwest Marine's K12.
[Update 2007 Jan 27: I've also
considered the RS Feva, which looks like it would be a good boat to
take the kids out in, and - well - I wouldn't have to build it. In
researching that, I found the wikipedia article,
which pointed me at the Mirror
Dinghy. You can only buy kits for the Mirror, there's one place
in Ontario which makes the kits, and they take around 150 hours to
build. Hm.]
Ever more whack-a-mole
posted 2006 Mar 25
Continuing on with the game of whack-a-mole. It's hard to get
motivated to continue onwards, because progress is so slow (and
difficult, because I'm always reminded of how poorly I assembled the
hull itself). I also suspect motivation wanes because it takes long
enough to get everything set up, that it's really something that
requires a couple hours to get going - and these days, finding a
couple hours is getting harder and harder. The kids are in bed and
the house is clean by 8pm, and I go to bed between 9 and 9:30. And
there's no other time during the day to get anything accomplished.
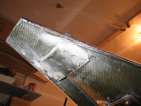
The bow now fits nicely - there's about 1/4” of space
laterally in there, and I can shift the deck side-to-side when I press
deck to hull. I took a few pictures of how station 8
fit, and have come to the conclusion that 1) pictures aren't
productive - they aren't accurate to tell what to focus on next
(despite advice to the contrary),
and 2) the deck and hull need to be clamped to really understand what
to focus on.
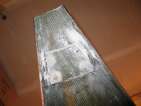
I also cut some templates out of matte
board, so I could ensure the stations fit correctly at station 6
(against the backing block of the jib track). This has worked really
well, and I'm going to use them again for the backing blocks for the
bevel pieces under station 8.
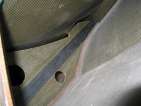
I also took another leap of faith and cut the first hole where the
centreboard trunk should go (measure twice and all that). This led to
the determination that the hull was within 1/8" of the deck at this
point - pretty good tolerance.
I took a day off work and spent most of it working on the boat.
One of the things I did was cut an additional 1/8” off the top edges of all the
bulkheads. Bram's original directive was to take about 1/4”
off; when I first did this I
only removed 1/8”. Bram's VMG boat had an
overhang where my middle finger would fit up to the first digit. I
figure this is how far up I need to get mine. I'm not there yet, thus
the need to cut down the tops of the stations. It's also worth noting
that I cut down the bulkheads by 1/8”, the soldiers by
1/4” (too much), and the tee-soldiers not at all. I've had to
rasp the trailing edge of the tee-soldiers down, but I doubt I can get
to the point that the leading edge meets up.
Also during day off I picked up some new playdough, and now I have a
lot more of it, and it'smuch squishyier. This means I can spread it
out all over and check once where the deck is high across many
stations - which makes work a lot faster. Because it's squishier, I
don't have to worry about the playdough not deforming when the deck
meets the hull.
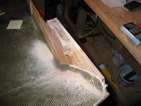
I also spent some time trying to get the bow even better off. I
laid a strip down over the tee-soldiers to see what was high on the
bowpiece. The rasp has a tendancy to remove more material at the
front and back (it's hard to always rasp perfectly level), so the
middle of the bow piece touched the strip. I used the edge of my belt
sander, turned sideways, to make this perfectly flat.
Re-drilling the bow holes
posted 2006 Mar 19
It's been two slow weeks of trying to fit the bow into the space
available in the hull. It's terrifying work, because I'm slowly
carving away the edges of the hull where the bow piece fits. I
finally got to the point where no more than 1/8” of hull was
left, and I still had to get the bow to slip down a good 1”. At
this rate, the two sides would poke out the side of the hull. Before
I did that, I figured I would give Bram a call.
Bram said "forget that" and recommended I drill out the tee-nuts,
fill the holes with epoxy/graphite/404, and re-drill new holes using
the same entry hole but a different exit hole. He even suggested not
bothering to put new backing on it, since what was there already would
hold just fine. This bouyed me enough to give it a shot.
I drilled out the neck of the tee-nuts from the bottom, then sanded out the insides of
the holes. Tape the bottom, and fill with epoxy/404/graphite
(I also filled a void in
the backing epoxy).
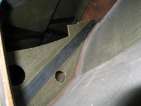
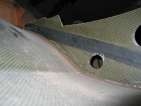
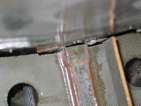
Once that cured, I drilled new holes. They use the same entry
point at the top. I lined them up so they are very close to vertical,
perhaps even tipped inward slightly, and around
3/16” from the widest point of the tube for the bow pole. They
also tip forward very slightly, the exit points are about 1/4”
further aft than the first set of holes.
I pretty much nailed
the points I wanted to come out at. The new exit points are around
1/2” further in than the old ones - the old holes are going to
be cut right out. For this reason, I didn't bother removing the entire
backing plate - there's enough plate here that these won't have any
issues. (I also considered adding in another layer of backing, but
that too didn't seem worth it once I saw how much further in these
holes were.) The tee-nuts don't even touch the previous holes.
Once this was drilled, I removed the old tee-nut backing pieces --
I sanded off the containing s-glass, and then hit them edge-on with a
hammer and screwdriver. Sand that down, and there's a flat surface for
mounting the new tee-nuts. Widen the holes for the neck of the
tee-nut, and bond in
place with epoxy/404. All that remains is glassing over them so they
don't pop out.
Good to go again.
Also this week, I bought a few acorn nuts and cap nuts for the
centreboard trunk inserts. (Cap nuts are $2.99 each - not cheap!)
Oh Mole, are you eating through my hull?
posted 2006 Mar 12
Still fitting deck to hull, mostly making the bow fit correctly.
I've shaved off as much of the sides of the backing block as I
reasonably can. Now I'm carving into the sides of the hull. On one
side, I figure I have around 2mm of hull left - and there's still
plenty of space between deck and hull. This isn't good. If I keep
on at this pace, I will have to have the fitting pop out the sides
of the hull - which would look rather weird.
I called Bram and described my problem. Bram said, Don't cut
through the sides of the hull. Just rip out the existing tee nuts,
fill the holes with epoxy laced with graphite, and drill new ones.
No need to even put another piece of backing block down, what's
there already should be fine.
Now that I have a plan and some idea of what needs to be done,
I'm happy to plow away again.
I also bought a few new screws. Most of the reason to
get this order was the stainless 1/4” tee-nuts - I ran out, and
with this re-drill, I need two more. I can't source them locally.
While I was at it, I got the two lengths of 10-24 square head screws,
which should allow me to fit out the entire deck without cutting
anything down. But everything else I subsequently realized I could
get the quantities I needed at West Marine, without much hassle.
Should have got them there.
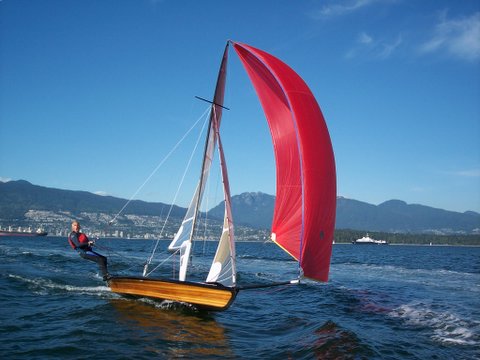
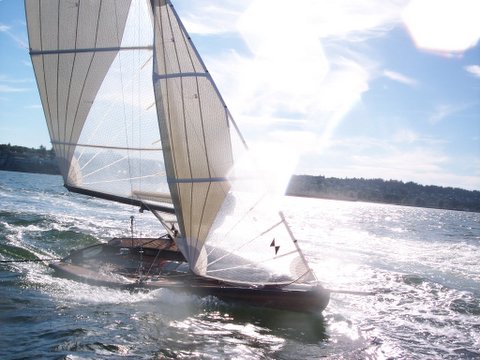
And here's a couple pictures to keep you boaty (since I didn't do
much of anything while I pondered how to solve the bow problem). This
is Mike, sailing out of Jericho
in Vancouver.
In other news, there's been an interesting conversation on Sailing Anarchy, which
must be where all the cool kids hang out. This is the
thread. Ken (WaveDragon) put up a great post.
Reflections of a newbie swift builder.
I have a green thumb, but thumb screws for any wood building. I
have a small area of macular degeneration in my dominant eye. I have
ADHD and often confuse my right from my left. I am sometimes
hardheaded when it comes to my mindset, especially when it comes to
any project. I will often over-complicate a simple process and have
to redo it. I often deviate from the tried and true to find my own
way. Costly, but that's my problem. In the end it has been more that
worth it. I have another extreme toy.
Hence building a swift solo was the perfect independent plan. Done
completely alone. The only help I needed was for flipping the hull.
Once that was sandwiched, I found independence again. I completely
messed up my first launcher dolly, still being new to the epoxy
process. It was almost impossible to destroy. I knew then, this boat
was going to be bullet proof especially with the exotic hybrid weaves
of carbon, kevlar and the s-type glass called for not to mention the
multiple blends of epoxy compound combinations. The sandwiched
strength and beauty of redwood cedar that makes for a boat like no
other. It's trice renewable, plentiful and lightweight as a resource.
A probable classic that will stand the test of time, performance and
continuance. I think we have a hit here.
The manual was self explanatory. A testament to "If I can do it,
so can you." My posts to the builders'forum for clarification were
minimal. The responses were nonjudgmental and always helpful. I
loved the archived supplement on the website: This compliments the
manual in a way that it becomes our own. A unique evolving gathering
of constructive experiences, problems encountered and resolved minus
the Yak. It's a key to the understanding of a process of what may be
taken for granted by an experienced woodbuilder and/or boatbuilder
using the FRP (Fiberglassed reinforced plastic) method. A builders'
discourse for the uninitiated. A small but essential addendum to
improving our one design class.
I think it was chance that the selection of building a Swift Solo
excited me so. Maybe it was the young lady on the cover of Wooden
Boat, inspiring me like a call of the wild with dormant talents yet
hidden, like an ancestral right of passage yet incomplete. Maybe it
was reviving my young adulthood memories of catamaran sailing with
the promise of high speed sailing. I had no idea that the Swift Solo
would be at the top of that game, at least in the circle of high
performance small craft monohulls. It's speed plus high to weather
manoeuvrability. How lucky could that be?
If one could be smitten by beauty, it was my flaw. Somehow beauty
justifies the higher cost. Why else do we assign all manner of power,
fame and wealth to the chosen ones. The set-up of my space and tools
devoted to a process of wood strip building I had yet to learn.
The trial and error of learning to mill by first planking then
stripping then coving and beading this aromatic wood. Yes, I was
doing it from scratch. This extra step I wanted to do. The hull and
deck being the easy parts to create, just time consuming. So many
parts to build. Step by step it got done. I couldn't believe I made
this. I spent more time gawking at a piece than it would take to
build three. I'm not a craftsman nor a technician. Just an average
joe with a dream.
In the end, I yielded to convenience. I had a boat that I wanted
to get to the water. There were builders in the class who would build
the remaining finished products for me. Like pre-rigged spars, the
rudder/tiller cassette, the forestay, and the Vang arm. What I got
was an excellence in craftmanship of products. I got pre-designed
foam blanks for me to complete the rails, the blades and the launcher
throat. I got all of these.
The pdf's explaining the lay-ups and rigging were like the secrets
to our craft; once done the experience added to the layers of my
being. Like belonging to a guild of boat masons of the higher
spiritual order. I felt like being part of that. More than anything,
it was the satisfaction of completing this unique design hopefully
within specs of the class. What remained was adding state-of-the-art
hardware. A tinkerers dream. One could tweak this or adjust that
when adding the non-wired rigging and the mylar reinforced sails with
carbon, kevlar and spectre threads.
The combinations of tactical adjustments are endless. What 's more
one could do this on the fly. Now try that for solo seamanship. An
unparallelled experience for one person trying to get the most out of
his her boat with changing conditions. The challenge remains to
unravel the secrets of performance as this boat has yet to test and
chart the winds, waves and courses across this Nation and other
continents. The other half of my odyssey, my dream, my soliloquy.
I thought I was alone, but not really. I was part a class of
gifted men and women who had all completed this particular design. A
bunch of people assembled throughout the world for the purpose of
competing to the best of their ability and to have fun. I stand in
awe of each of their crafts. As a new builder it speaks volume to me.
Mind you I look at mine as the worst on the lot. I don't care because
it was so much more than what you see. I take pride that I have a
swift solo. I will look forward to the adventure that now awaits me.
Now just because you bought one or are thinking of purchasing one,
please take enormous pride. You have skipped all the above cursing,
bemoaning and misgivings of following a beaten path. The empty space,
used tools, lots of sawdust, the sweat and perseverance, juggling of
family and events. Each boat is worth all that. I respect the
advanced skiff sailor who can just jump on and fathom all the workings
of this high performance boat. Thank you Bram and all the builders
out there for helping me complete this awesome toy.
I spent time with these people and their families last year at Fort
De Soto. The memories and camaraderie of future gatherings will be
the legacy of stories yet to come.
Wave Dragon
Treasure Island. SF, Calif
Oh Mole, where art thou?
posted 2006 Mar 05
I'm continuing to fit the deck to the hull, and it's slow going
(mostly because I get depressed about how something isn't fitting
very well and have to stop and regroup). I have learned a couple
important things, however:
- Drill the holes for the forward set of bolts in the bow fitting
as vertically as possible, perhaps even tilted inwards. It's
ridiculous how much time I've sunk trying to get these things to fit
well. I'm starting to carve out the inner edge of the hull to make
the bolts fit - much more and I'll have to re-do the installation of
these things.
- Make the t-soldiers (and the other soldiers) about 1/2”
longer than called for. The forward end of the soldier has to touch
the deck, and having this extra 1/2” of height means the rise
of the deck won't be a problem. And it makes fitting a bit easier,
because you don't have to worry about how to make deck touch hull
(as I am).
For the first problem, I have a contingency plan. I can slice off
the front half of the backing block, chisel off the epoxy and hybrid
layer, fill in the holes, then re-drill the holes more vertically and
re-install the backing block. Desperate, yes, but perhaps necessary.
I'm not sure I need to yet. (Yet - there's still 1/4” between
my #2 t-soldier and the deck...)
For the second, I will probably have to create wedges of t-soldier
to fit between the soldier and deck. I'll tape the edges with epoxy
tape to keep the piece in place. Not the greatest, but it should
work.
Page 29 of 62
« First
…
«
27
28
29
30
31
»
…
Last »