Finishing the gunwale edge
posted 2006 August 28
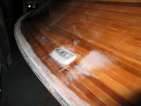
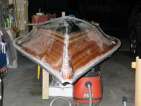
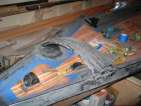
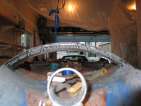
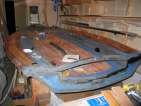
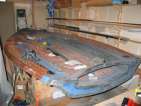
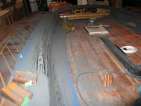
Next up was sealing everything with tape. First, I sanded everything down.
Next, I applied a mixture of epoxy/407/cab-o-sil around the hull and used a
washer to get a nice edge on the fillet. Toward the bow, I used a
smaller washer as the gunwale slopes up steeply; aft of about station
4, a larger washer was better so more filleting material would be left
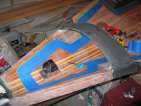
behind. I also filleted the chainplate blocks so I could
get the same slope on both blocks.
After about four hours (a bit too long - the epoxy was too set up),
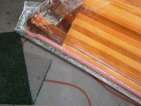
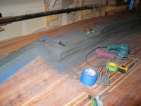
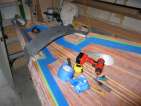
I came back and applied the glass tape. The glass tape
itself I taped onto the
deck to ensure it made a nice tight bond around the gunwale edge. It
turned out that 3” tape isn't made anywhere (as the instructions
suggest), but 4” is perfect - the right width to roll over and
tape in place.
After another three hours (again slightly too long), paint the tape with
epoxy/407/graphite, to fill in the weave. And after *another* three
hours, another layer.
For this final layer, I used 3 squirts + 1/2 tblsp graphite + 207 + 1
tblsp 407. The 407 gives it a slightly grey look - but makes it a lot
easier to apply and you don't have to worry as much about sanding
through. After doing this, I think 1 tblsp of 407 for 3 squirts is
about the right proportion.
After this, sand
everything down, and it's ready for the actual black coat.
Completing the seal
posted 2006 August 21
Ever more sanding,
this time taking down the gloss on the second coat of black epoxy. Of
course, that just means that a third application will be
required. Once I'd done all that, I went back and marked all the spots that
needed a third application.
Once that was done, it was time to flip the hull and complete
the seal around the deck/hull - the only spot left is the space
between station 5 and the bow. I sanded down the inner edge of the
gunwale, as well as the lip of the hull, so there would be a good bond
(I should have done this while they were apart). I also sanded down
the excess Pro-Set.
While it was wet, I ran my finger along the gap - except where the
clamps were. They need a bit more cleanup. Pro-Set cures *very*
hard. I used the Dremel to take off the really high parts.
With the sanding done, I cut a syringe tip down so the hole was
quite large and would provide a thick bead, and gradually worked my
way down the crack, pushing in on the hull so I could fit the epoxy
between gunwale and hull. I also filled in some of the gaps
in the Pro-Set at the bow and along the gunwale.
Second coat of black
posted 2006 August 14
Sanding, sanding, sanding. I sanded down all
the black I had applied - several long hours of sweating - and sanded
through in a bunch of places. (Tip: 60-grit was good enough for this,
and use a wire brush to stop it from clogging up, although it does
dull the paper.)
[Update 2006 Oct 15: I found an even
better way to get the paper clean. Instead of scrubbing with the wire
brush, just whack the paper with the wire brush. Gets all the epoxy
off with a few whacks, and the paper doesn't dull.]
During a bit of offtime, I bonded together the first set of inserts
for the deck and hull. I sanded down the pieces I had cut, then stacked
them four high and slipped them between 2x4s (plastic separated).
Nine squirts of epoxy/403 was enough to bond all eight pieces
together. Clamp, sand, and they'll be
(almost) ready.
Next up, I put an extra layer of hybrid/s-glass along the leading
edge of the launcher
throat. This was in response to a conversation
on the list about how this area was getting grooves cut in it - and
since I was there and just about to do a second round of black, I
figured I'd put it on. I painted the hybrid in place,
then squeegeed out excess epoxy. I then layed the glass down over top,
painted again, and squeegeed again.
While that was curing, I painted down all the black edges (again),
and came back and painted the throat. Wait a little over
three hours, return, and
apply layer two. I didn't go for three this time - I wanted some
sleep. (There's going to be another application of black on the deck
- and I think I'll do it while the deck is upside down and I'm
finishing the hull. Then at least the drips will drip the right way.)
Sailing gadgets
posted 2006 August 10
Boys just wouldn't be boys without gadgets. (And pyramids
of imaginary polyhedra to juggle.)
There's always the TackTick
Micro Compass. New on the scene is the Velocitek Speedcompass,
which measures your bearing and speed (using GPS!) while you're
underway. Or of course a Uniden
Mystic, referred to on the list.
And once you get out on the beach, having a Kestrel
2500 Wind Meter seems like a good idea. Once you get on the boat, a
Boye Knife with
a Sheepsfoot blade would be the thing to have at your disposal, for any
sticky situations you get in to. Of course, perhaps plain old sailing
gloves are what you're after - in which case, AtlasFit 300 Work Gloves
which, according to Sailing World, are cheap, work great, and fall apart quickly.
And then, of course, there are the watches. There's the Aquastar Regatta, which
used to be automatic but is now always quartz. Of course, you can
still find one in North America, unlike the Memosail Racing which
certainly looks like a cool watch if only you could find one. Of
course, there are plenty
of alternates.
And if you're into aeronautics, a Junkers looks pretty cool.
For rowing, the SpeedCoach
XL2 seems like the best choice.
Applying black trim
posted 2006 August 7
Time to blacken things up. First off, I changed the pattern at the
bow. I decided that the previous pattern looked too much like a goofy
looking "kayak hatch",
and I was after the "straight" look. So I ripped that off and used
the standard 1 1/2” edge from the gunwale, and went back to straight. I also decided to
have "flaps" under the
throat instead of covering up everything under the throat. The
launcher sock will be over this anyway. Bram's boat does cover up
everything under the throat, I found out later.
Next, I sanded out the launcher throat - I was
worried that with the black coating, there wouldn't be room for the
spin pole. I sanded down the last high spots and it was time
to go.
The first layer took
about two hours to get done. For the first pull, I used six
squirts/407/tablespoon graphite/teaspoon 410 (per here)
- which started to cure in my hand before it was all on. For the
subsequent pulls, I used only three, which is about right. One layer
doesn't provide much opacity - two is really the minimum.
The first layer was complete at 8:30, and two and a half hours later,
with the black not quite tack free, I started the next one. It went
much faster - 30 minutes - just had to follow the lines. Once that
was tack free - three hours later, I started the third application, in the
wee hours of the morning.
Next, sand. Gradually
remove the tape once it's
clear you're sanding into the green tape. Pretty much everything gets messy. But it is
starting to look like it's getting done...
NOT fun and games
posted 2006 August 2
Just so you don't think that swift building is all fun and
games, there is some hard work to do.
Page 24 of 62
« First
…
«
22
23
24
25
26
»
…
Last »
