Slooooow
posted 2007 February 28
So much for the best laid
plans. Things are going pretty slowly. Perhaps it's the fact
that I'm in parenting
class every Wednesday (and reading the required reading one night
a week as well). Going to Toronto for week-long recruiting trips
doesn't help any either. Perhaps it's the fact that work is crazy stressful - new
boss, trying to keep
up
with
the art.
Or perhaps it's the fact that I'm not having
too
many
successes
recently. But I'm
certainly not on the schedule which is going to let me sail this
summer...
Rudder box
posted 2007 February 26
I finally built the rudder box (after preparing for so long). I
wanted to have the final coat of black on before doing so
(since it adds a teeny weeny amount of thickness). With that done, it
was time.
I was chatting with Bill about how he built his rudder box. His
answer:
I wrapped the rudder in a thin cotton towel to provide the thickness
that I thought that I would need to allow installation of the fuzzy
Velcro tape as my packing material for the rudder. Over that layer,
I wrapped plastic sheeting and taped it closed tightly around the
towel. My layup consisted of an absorbent layer, peel ply, s-glass,
several hybrid layers, another s-glass layer, peel ply and absorbent
cloth. I made a vaccumn press with plastic sheeting over the whole
layup and rudder and my shop vac to compress the layers. The top
and bottom edges were trimmed to fit between the gudgeons and then
they were wrapped in carbon tape to a thickness that would position
the nylon spacers away from the leading edge of the cassette. The
nylon spacers were held in position for the final tape wrap with a
wooden jigs that I made that fit over the leading edge of the rudder
and had a hole drilled in each to hold the pintel parallel to the
leading edge. There were extra spacers that completely covered the
pintel for the entire height of the cassette. I masking taped the
jig pieces to the rudder and positioned the breaks in the spacers
such that they would be inside the tape wrap. The spacers were then
over wrapped with more carbon tape and several top layers of glass
tape. Take your pintel to Home Depot and find the nylon spacers
that are 1" in length.
Well, that got me going. I just had to try vacuum bagging. I
have the Gougeon publication 002-150
Vacuum Bagging Techniques and I spent an hour flipping through
that to get ideas.
I had a free afternoon, so I wetsanded the centreboard
(with Tristan's
assistance). Still a few scratches to get out - I
need new 220 grit paper.
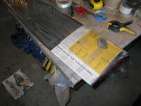
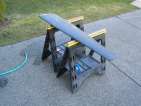
Time to get started. I wrapped the rudder in just
under 1/16” width of newspaper. I built a bag using 2mil plastic
sheeting and 3M mounting tape for the edges. I didn't have quite
enough, so I used plain packing tape where I ran out. I screwed a
board into the edge of my workbench (nice to have a workbench I'm
comfortable doing that to), and then clamped the rudder to it, so
it would stay vertical (and with trailing edge up).
Then it was time for the actual layup. I wrapped a piece of mylar
around the newspaper, then a piece of muslin (not all the way into the
trailing edge, so threads don't get stuck in there), then a piece of
peel-ply. The peel ply was held in place by a piece of tape sticky side
out and holding the ends on either side of the trailing edge (again so
I don't have to dig out the threads). I drew red lines 9” apart
on the peel ply so I knew things were going on straight (and these
lines helped a lot).
Then lay it up. Two layers of 30”x9” s-glass, one
strip of 50”x9” carbon, one strip of 50”x8
3/4” kevlar; one final strip of 30” s-glass. Then
peel-ply, pink cotton, and a layer of musquito net as a breather
layer. All this layup took about 13 squirts and went really quickly -
I used expoy/206, and really I should have used 205. I had the entire
thing layed up in 40 minutes.
I then put the entire rudder into my plastic bag, taped the bag
shut, cut a hole for the tube, taped the end of the vacuum to the
tube, and flipped the switch. My vacuum was clearly struggling -
there wasn't so much leakage that this would be ineffectual - and that
caused it to heat up. I took the vacuum itself and put it outside the
back door, so at least it had some cold air to vent in and out.
At 4am, I decided I'd turn the vacuum off - the epoxy was pretty
solid by this point (the brush I used to apply the epoxy was getting
pretty hard). Overall the vacuum did suck a lot of excess out of the
layup. The bag was pretty pathetic though - without the constant suck
of the vacuum, it would never have held the vacuum.
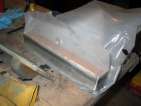
With that all done, it was time to see how it worked. I stripped
off the outer layer slowly - getting off a strip from top
to bottom was the hardest part. I just pulled off pieces of the
cotton with pliers. Another trick is to slip a putty knife between
the cotton and the peel ply (not the ply and the part) - and slide it
apart. Once a strip
comes off, getting the rest off is pretty easy.
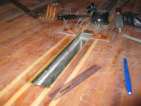
After that, I had to pull the box off the rudder. This proved
difficult. I figured with some tapping I could slide it right off -
but I was so effective at making sure everything was tight, it won't
budge. So I started to cut
out the newspaper between the box and the rudder. What a hassle.
In hindsight, I would probably do the following differently:
- Use real mastic tape for the bag. It's cheap. It works way
better than what I did (I certainly hope). I had lots of leaks
around the bag, which mastic would hopefully solve.
- Use a real valve. They're cheap - $16.65
for three (look for "West System Vacuum Cups"), and they would
be much better than my taped-together improvisation.
- Figure out some better way to pull the box off the rudder.
Removable newspaper? Leave an edge of paper along the top? Put
tabs of tape along the top to pull on?
I'll also say that this process worked quite well - the layup
seems pretty good from what I can tell so far. Using this method
(even this Frankenstein approximation) would have been much
better
on
some
of
the
small
parts.
[Update 2007 Mar 12: A few links
after the fact. In a conversation with Greg, he mentioned that
vac-bagged parts can actually be weaker than non-vac-bagged, because
the width of the epoxy layer allows outer layers less flex. (This
would be true on a rudder for instance - because layers are further
from the core in regular layup than if they were vac-bagged, the
rudder is wider and thus when flexing the opposite edge is under
tension, and because it's further from the core, won't flex as much.)
I found a few good overview sites describing some vac-bag
techniques. Bertram31 has a good overview.
Fibre Glast, a supplier, has another overview
(as well as products).
Building wings
(vac-bagging is really popular in the model airplane/rocket
underground). Using a FoodSaver
as your vacuum source.]
[Update 2007 Jun 19: Bram posted
his PDF on how to build the rudder cassette. Of course, it's much
easier than what I went through. Sigh. Local copy.]
Trailers
posted 2007 February 19
I was on a recruiting trip to Toronto all week this week - and so
nothing was accomplished. But I did enjoy some fine French Canadian cuisine.
I figured I'd put up some links I've had kicking around for a while
now: trailers. I've mentioned trailers before, but haven't really
searched far and wide. The problem has been determining what
qualities to look for - it seems like pretty much everyone builds
trailers, and differentiating between good and bad can be tricky.
Overall, these seem like good starting points: NMMA
Trailer Certification Program and NMMA
Certified Trailers. Surely a manufacturer in there has something
decent.
A few possible starting points:
Continuing on the rudder
posted 2007 February 12
Another coat (the final one, I hope) on the rudder and centreboard
this week.
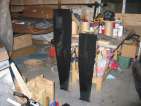
But first, because I've widened the centreboard trunk hole in the
boat, the insert block is
now a bit too narrow to fit inside. So I wrapped it with a layer of
2” glass tape, a layer of carbon tape, and another layer of
glass, to fill up some of the extra space. This wasn't quite enough
width, and I added another few layers: 1x 2” glass tape, 2x
2” carbon tape, 1x 2” glass tape. That was sufficient.
With the excess epoxy, I sealed the edges of the
actual hole (no more shaping - it's done).
Then, another overnight epoxy application — one, two, three. This is the fourth
application - one (I can't
believe that was in December), two, three (filler). And
hopefully the last — I used epoxy/207 this time.
It's been my habit to flip the boards over after each application,
so the drips go opposite directions. But the first application was tip down, and the board
wanted to roll forward (you'll notice the tubes with weights holding
the board in place so it doesn't fall forward). Thus I only flipped
them once, and after that kept them tip up. After all, it hardly
matters if I started tip down or tip up for three applications...
The following day, I gave them a quick sanding of the exterior to
get the high spots down. Next step: wetsanding. I didn't want to sand
everything to grey, I'll let the 220 grit do that. (The epoxy at this
point isn't rock hard, either - sanding was very quick.) There are
small (1mm) "bubble
holes" on the upper sides of both boards. I'm not sure where they
came from - it's the first time I've seen something like this.
At around 10am, Pascal escaped into the garage and tried to walk by
the boards, and put his hand into the not-quite-cured epoxy on the
centreboard. He got it all over his left hand. I immediately cleaned
his hand (having learnt my lesson the hard way) - two solid scrubs
with acetone laden paper towel, then a scrubbing with Orange Goop
(which kinda works to remove epoxy, but certainly not as effectively
as a thinner like acetone), then a scrubbing with standard soap, then
another scrubbing with a scrub brush and standard soap. I'm hoping he
doesn't suffer through what I
did (and so far, he seems just fine).
Finally, I cut the materials for the rudder box. The distance
between the gudgeons is 8 3/4”; I cut everything but the hybrid
at 9”. One wrap of the rudder is 21”. I cut enough
material for two wraps each of carbon and hybrid, and three of
s-glass. The hybrid and carbon is 50” wide, and I just cut off
an 8” strip. The s-glass is 30” wide, and I cut three
strips, so it will overlap quite a bit. Overall, it's a good thing I
bought too much during my order for the rudder and
centreboard (despite my thinking I wasn't overbuying too much...)
Cutting the centreboard trunk hole
posted 2007 February 5
Two things this week - rough-cutting the centreboard trunk hole, and
filling the tips of the
centreboard and rudder.
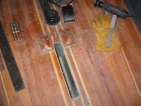
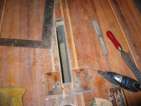
When I cut the hole, I just sat down and started cutting. I
(roughly) measured using the distance from the inner trunk walls to
make the width about right. I used the rasp to take down the biggest
area, then used the dremel to get into the corners. I also put the
routing base onto the dremel and ran it along the edge of the square
to get a straight line along the edge. Overall it didn't take long at
all - an evening.
I probably overcut on the starboard side, perhaps by as much as
2mm. (You can see this in the picture - one strip of
yellow cedar is thinner than the other.) Were I to do this again, I
would mark two parallel lines on either side of the line exactly 23mm
from the centre line, and then gradually work my way out to that line.
Then the insert would be centred on the deck. (Although this may not
be entirely desirable. If the trunk isn't dead-on-centred, it means
that the board won't be centred in the trunk, and so the extra width is even more
necessary to ensure the board fits in the trunk. And I know mine is
out by about 1/8”.)
I'd probably also move the bevel
blocks out from the centre by at least 1/8”, perhaps
3/16”, just to allow more space for the insert.
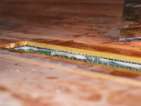
I also discovered that there is a bit of a gap between the Pro-Set
and the deck. I'm freaked out about this - I spent an evening killing things to calm myself
down - but there's absolutely nothing I can do. So I syringed a bunch
of epoxy into the gap and hoped for the best.
I also cleaned the
tips of the boards and melted out the trailing edge of foam with
acetone. The acetone dribbled way into the board, and I melted more
than I wanted - 5” on the trailing edge of the rudder. (The
leading edge of the rudder was about 3” deep, and the
centreboard didn't really fall prey to the acetone.) I filled all
that up with epoxy/407
and waited for it to get relatively solid.
The second application
was a mix of epoxy/graphite/403/cut up carbon (Greg's suggestion).
When I first put the carbon in my first three squirts, I put carbon in
before graphite/403 - not the right choice. Put in the other fillers
in first. I also put in *way* too much carbon - a few cuts is plenty,
and work up to the right consistency.
The other thing to keep in mind is that this stuff is hard to move
around, it creates long drips that need to be squeezed into the
space. Plus there's much more likelihood for voids, so it needs to be
pressed in place (especially along the trailing edge). I eventually
smoothed it out with my finger. Even with all that, I still had a
void in the rudder.
Once that all cured,
sand
down, coat with a layer
of epoxy/graphite (so the kevlar soaks up some epoxy), repeat. One day these
things will be done.
Page 18 of 62
« First
…
«
16
17
18
19
20
»
…
Last »
