Continuing on the rudder
posted 2007 January 29
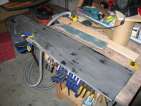
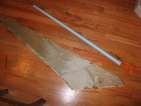
Spent this week continuing on with rudder and centreboard
finishing. First, there was a bit of fairing after last week's
adventure (and I have to say, fairing the filler down took just as
long as actually fairing the board itself).
Next, I decided to fill the top of the boards with epoxy, to finish
them off. I painted some acetone into the rudder to clear out the
blue foam... but neglected to consider how quickly acetone burns
through foam. It burns through FAST. I ran inside and dumped some
water inside, and that seemed to calm things down - but now I have a
wet interior of the
board, and I need it to be bone dry (especially the wood) before I
seal it off. I placed it upside down on a heat register in the den
for a couple days, and that seemed to do the trick.
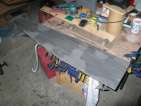
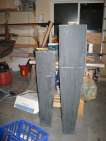
Next, I drilled the
blue foam with the dremel, and then filled the top inch with
epoxy/410/403/graphite. Because of the acetone adventure, the rudder
depth was a bit more than 1”; I filled the bottom part with
epoxy/410, and then poured in some (heavier) epoxy/403/graphite, which
just fell to the bottom.
Of course, 1” deep of epoxy boils. Just like dregs of epoxy
in melted red cups (and
some not red ones). I knew this from building the bow
fitting. And I saw it start bubbling. And I felt the side of the
board get hot. And I thought "gee, I bet that isn't going to work".
And I didn't pour out the excess which hadn't yet boiled. And I went
to bed. And I made a giant mess to clean up. Man I was mad. I knew
better than that.
So, the next night, after stomping around the kitchen during dinner
and explaining to Tristan that I had made a mistake and was angry with
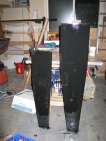
myself and now I had to fix it, I got right back in the saddle,
drilled out all the poorly set epoxy, and routed out the top 1”
of the blade - so I can do it again, 1/4” at a time. (Routers
are crazy powerful tools - this is the first time I've used one since
2004.)
Then, I put in a layer of epoxy/206 (to slow the reaction)/407 into
the very bottom to fill up the drill holes and made a level bottom. I
let that cure, and came back and sanded off the top edge and sanded
off the sides. I then cooked up a recipe for all the filler,
and filled it in three
squirts at a time.
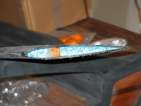
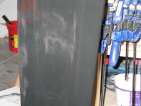
Even the last layer of
epoxy/207/graphite had small bubbles in it - and it was only about
3/16” thick. Of course, immediately after having done that I
read the line in the instructions which says "slide the board into the
hull and mark along the top so the top edge matches the angle of the
deck". Oh yeah.
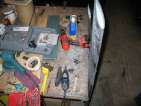
How much epoxy was that?
posted 2007 January 27
At some point, I realized that I had gone through a lot of epoxy.
I set out to find out how much. When I first ordered my big order
from John R. Sweet (who has
since sold the business; now it's Sweet Composites), I
ordered two 4.35 gallon containers of West 105-C resin. The first one
disappeared around 2004-08-30. The second one
disappeared on 2006-08-19. And since then,
I've bought six cans of 105-B resin - another one and a half of
the big tubs. Could have saved myself a bit of money there... (As an
aside, a lot of the time there's a small amount of epoxy left over
after a job - and it just cures in the plastic cup. And I've gone
through quite a few plastic cups...)
While I'm at it, I should mention that the quantities specified in
that Sweet order for 403 microfibers ($150, 20 lb. carton), 407 filler
($290, 14 lb. carton) and (to a lesser extent) 406 colidial silica are
way too much. They're the size of moving boxes - 14” x
16” x 21” - and I've only taken small amounts from them.
Better would have been to buy the large cylinder containers from
Fisheries. (Psst, hey buddy - need any filler?)
Here's my laundry list of purchases for various West products:
| 2/ 9/04 | | John R Sweet Co | [bld] 205, 405, spreaders, syringes, gloves, rollers | 116.00 |
| 8/ 4/04 | | Fisheries Supply | [bld] more 207-SB coating | 69.18 |
| 9/20/04 | | John R Sweet Co | [bld] 2x205, 2x206, gloves, foam rollers, comfo, tape | 280.00 |
| 4/16/05 | * | Boater's World | [bld] 2x 10⁵ 1gal West resin | 108.78 |
| 8/ 5/05 | | Fisheries Supply | [bld] 405 filleting, 209 special hardener, fien bags | 77.81 |
| 10/ 8/05 | * | West Marine | [bld] gallon 105 resin, north U tactics | 96.61 |
| 7/16/06 | * | West Marine | [bld] 105-B and 207-SB (again!) | 146.86 |
| 11/20/06 | * | West Marine | [bld] 105, 205, 207, sunglasses | 194.71 |
| 1/20/07 | * | Fisheries Supply | [bld] 1x 10⁵, 1x 205, bushings RWO 3034 | 165.28 |
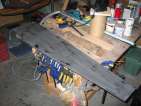
epoxy pics:
Tiller, Reloaded
posted 2007 January 22
This week was focused on two tasks: fill and fair the centreboard
and rudder (primarily to burn time up while waiting for another tiller
blank to arrive from Greg), and then to build the tiller when the
blank did arrive.
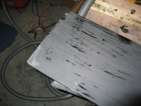
I started in on fairing the centreboard, and
moved on to the tiller.
There are definitely some low
spots in places, particularly on the side which was curved down,
so this filling is necessary.
I marked around the areas which needed filling with a pencil - in
order to attempt to avoid the mistake I made on the hull, where I
marked with red marker, then
epoxied over it, then sanded back down to the marker - which still
shows through. Perhaps using a (graphite) pencil won't be similarly
afflicted. Sand all the low areas out with the random orbital, then
fill with a mixture of
epoxy/205/407/graphite. Return and fair. Sanding these down
takes a while, as long as sanding the black does. At first it looks
like it will be quick because all the high spots disappear, and then
you hit the big meaty area and slow right down.
Next up was building another tiller. Cut the scrap hybrid (again,
pulled so it was on a bias), and shape the mylar sleeve.
Learning from my last mistake, I wrapped a few pieces of newsprint
around the blank to model all the hybrid and graphite, and then
wrapped the mylar around the newsprint. Without the newsprint, the
blank slips about 14” past the end of the mylar.
I bought 9’ of 2”
light 7.5 (700 tensile strength) weight carbon sleeve. When
expanded, this fit nicely over a larger PVC pipe through which I
could slide the blank as well as the mylar sleeve. (Tip: Poking the
end of the blank or mylar into the flat sleeve opens the sleeve up a
bit and allows it to slide onto the pipe a bit easier.)
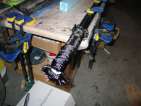
Then, it was all down to time. Wet out the hybrid, apply
the 3” uni-carbon
tape, slide the thick end of the tiller into the PVC pipe and cover 24” worth. To do
this, I slipped the (wet) tiller into the pipe to the right depth, and
pulled it out while squeezing the tubing in place. It would have been
better to have a slightly longer pipe, so the end of the tiller
wouldn't have touched the slack tubing (thus saving it for another
day). Then put on another layer of carbon sleeve over the entire
tiller, wrap in peel-ply, slip into the mylar sleeve (which was
exactly the right circumference, lucky me), slide that into the foam
core, and clamp to the bench top.
While I sliding the mylar into the foam saddles, I had a moment of
"oh f*** I've ruined another one" - sliding the mylar into the blue
sleeve, there's no easy way to cause it to go in, and the tiller
buckled and bent the mylar. It didn't break outright, though, and I
decided to just clamp and hope for the best.
From the 9’ of carbon sleeve I had, 66” remain. Were I to
build another tiller, I wouldn't use mylar as the separation
layer. I'd either put it directly in (with peel-ply) and then sand
off the blue (ug), or I'd use plastic wrap or the release film I bought from
Fibreglass supply. This would let me bend the mold, which I still
think is cool.
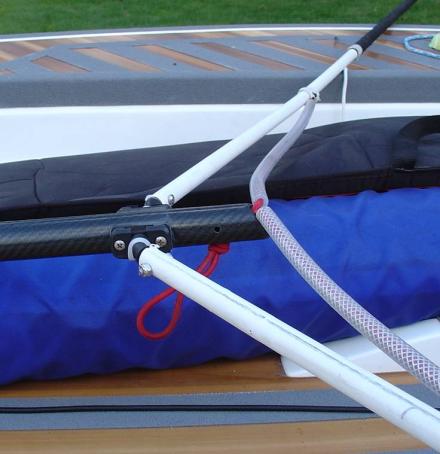
Finally, I filled the other side of the centerboard and rudder. I also have a
picture of the spreader
collar - one less part to build. After looking at this I probably
could have made it myself. But I'm building the rest of my boat. ;-)
Bill's building method for the tiller
posted 2007 January 20
Bill read my disaster
post and wrote with his proposed building method. As always, Bill has
great ideas - I like the look of his tiller (the curved look - he
clamped it to the jib track to get this; Bram is now using a straight
tiller with no upturn at the end). And the idea of bonding it with
just the hybrid, then slitting it and bonding in place, and then
putting the carbon sleeve around it seems like a better way to
approach it than building the tiller all at once and attaching to the
rudder box. Ah well. Next time.
Warren,
I read your recent blog about the tiller handle disaster and am
sorry that you broke the foam blank. When you get the new one from
Greg, try my method for the layup. Buy some hybrid sleeve from Soller
Composites.
Cover the foam blank with one layer of hybrid sleeve while dry,
stretching the hybrid so that it shrinks to the shape of the foam
blank. Hold the stretched hybrid in place with small cinch ties
placed beyond each end of the foam blank (like the twisted skins on
sausage links). Set up your jig (I used my jib track because it has
a nice curve) to shape the foam blank into the desired tiller
handle. Wet out the first layer of hybrid and squeegee it with
glove covered hands to ensure complete penetration to the foam core.
Cover the wet out blank with peel ply and plastic sheeting and place
this into the tiller handle saddle. Place the saddle and lay up
into the jig and clamp to shape while curing.
This will give you a base tiller handle that you can install onto
your rudder cassette before you add the final layers to the handle.
When cured, remove from the saddle and peel ply. Hollow out 12" to
15" of the end to be connected to the rudder cassette so that you
can fill it with epoxy filler made with West System 406/410 filler
and polystyrene pellets (crumbled foam cups or packing material).
The polystyrene pellets melt during the curing to make a strong but
lightweight, rice-krispie treats-like, structure. You will cut a
10" to 12" split into the top and bottom side of the hollowed out
tiller handle that will allow you to bend the hybrid around the
rudder cassette for bonding. Mix up the filler, stuff it all the
way into the hollowed out tiller and position it onto the rudder
cassette at the desired angle to clear your foot rails on the wing
steps with the rudder swing. I had positioned the pintle with
several 1" long nylon-sleeve bushings in the correct position for
the tiller handle to be bonded with the filler. You will end up
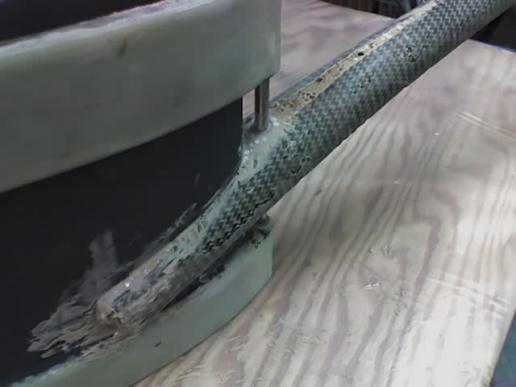
with something like the picture below:
You can see the tiny holes in the sanded filler where the
polystyrene pellets melted. The tiller handle was held in position
with a jig to line it up with the cassette while curing. I then
hollowed out the handle end to accommodate the tiller extension bungie
cord. Once the tiller was shaped and sanded to remove the excess
filler that oozed out while curing, an additional hybrid, straight
carbon and fiber glass sleeve was applied individually, with peel ply,
giving me four layers. Each sleeve was split to wrap around the
cassette aft end for strength and was allowed only 2 - 3 hours cure
time so that a chemical bond could be achieved. The sleeves were cut
extra long and wetted-out on the handle, with the extra stuffed back
into the hollowed out tiller handle end to strengthen the hole for the
bungie cord. The extra sleeve material was packed against the inside
of the hollowed out handle. When the final fiber glass sleeve, wetted
out with epoxy/graphite powder, had cured, I cut some flat
hybrid/glass stock (left over from the main sheet cleat base) and
bonded it to the tiller to fashion a flat block to mount the tiller
extensions. I drilled a 1/2" hole thru the bottom of the tiller
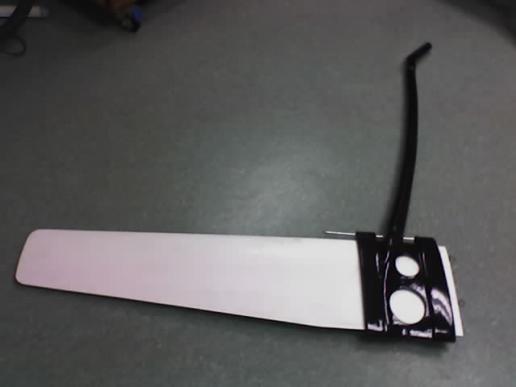
handle for the bungie cord knot. See photo below:
The finished handle and cassette was coated in several coats of
epoxy/graphite/406 to give it a nice smooth finish. See photo below
for the final product:
I hope this helps make your fabrication easier. Let me know if you
need any further details.
Bill
Here's a picture of Bram's latest tiller:
Black on the rudder/centreboard
posted 2007 January 15
This week I put another layer of black onto the centreboard and
rudder. Fairly straightforward — one two three — although there
were a few gotchas. Once I completed the first layer of
epoxy/graphite, I decided I was going to try and fill in some of the
divits and low spots with filler. I mixed it up and painted it on,
but it didn't take too well — it drooped and didn't stay in the
right place. I should have done this prior to painting the whole
board. (And even better, let it cure and fair it out before doing the
layers of graphite.)
Each application took five hours to cure. I believe this was
because the temperature was low enough to be a problem in the garage.
(Although that meant that I put the epoxy on at 8pm, 12:30am, and
5:30am. Odd, compared to the previous times I've done this.)
Then sand off the high
parts, and prepare to fair.
I also took a picture of the mast base (a.k.a. "butt plug"),
courtesy Greg. My list of needed
parts is slowly dwindling.
Requirements for sailing
posted 2007 January 12
I thought this post from Sailing Anarchy hit the
mark.
Observations From The Check Book
Many of you know that I have purchased a Flying Tiger 10 Meter.
This is a pretty big departure for me - back in my previous life as
a sailmaker I was used to getting the checks, now I have to write
them! I don't dig that. (Truthfully, it is not that bad, especially
with partners, and so far worth every penny.) Plus I was used to
just stepping on the boat, race, then head straight for the
bar. Okay, that has pretty much stayed the same, but now I at least
pick up the empties before I hose the boat off.
One of the reasons I decided to get back in the sport, this time
as an owner, was that I wanted to have fun, on my terms. Sure,
there is fun to be had on other people's boats, but I'm done with
that. I wanted to have my friends sail with me and create my own
particular brand of fun. We've just done the one race, and I'm never
going to be the "here's a tip from the expert" kind of
guy, but here are a couple of quick thoughts.
Find Your Fun. Sure, we all race hard, but in my book,
there has to be an unyielding fun factor during the race or forget
it, it just ain't worth it. Jokes, ball busting, ridicule
(especially the other boats) and a general level of verbal anarchy
is what I like. Kept within limits of course. No yelling. Ever.
Sure the occasional bark of "What the fuck are we doing over
here?" is fine, but yelling is for assholes, plain and simple.
Speed is King. I know, Captain Obvious just walked in the
room, but for me it has always been about sailing fast. The essence
of the sport is getting the boat going fast and keeping it
there. I've always loved that. Get on board and sail the bitch as
fast as she'll go. Sure, you need all the other ingredients to make
a good cake, but i always like the fast part.
Good Vibe. This probably ties into Find Your Fun. Is there
anything better than a crew that just seems to all be on the same
page? Everybody gets along, everybody digs the vibe that they helped
create. When we sailed New Year's Day, it was with guys I have known
for up to 20 years. There is a camaraderie that is worth building
and keeping. If it isn't a blast with your mates, for me, it isn't
fun. And it's gotta be fun.
Four years!?!?
posted 2007 January 11
When people read this blog, I get one of two reactions: 1) Egads,
four years?! You've been working on this for FOUR YEARS? or
2) You have two small kids! How do you possibly find the time? (Or:
When I get home from work all I want to do is read a book!)
When I first started this project, I told my Dad "I'll use my
reading time in the evening to work on it". Certainly I've done that.
I kinda miss reading now and have to squeeze it in somehow...
Basically, it goes like this. The kids go to bed by 7pm.
Household cleanup is complete by 7:30. At that point, I venture out
into the garage and work for 2 to 3 hours on the boat. On weekends, I
will occasionally spend naptime working on the boat - another 2 to
three hour chunk in the afternoon. (Weekend afternoon work is nice
because I'm less tired from the day's events and more motivated to get
out there and work.)
I work on the boat on the evenings maybe three to four nights a
week. A slow week is one night; a busy week is four. Every Monday is
"computer night" and I do website updates and bills and whatever else
needs doing. One night a week is TV night (usually Thursday or
Friday) and I spend it with Tamara. And there's usually something
else going on that I have to participate in: work runs late and I have
dinner at work, sailing J/24s on Tuesday nights, parenting classes, or
I just want to read a book.
Of course, working on building a boat two nights out of the week
means that it takes four years to get it done. I have one of the
earliest sail numbers (013) and was one of the first to buy plans
after the WoodenBoat
article, but my boat is also one of the slowest boats to be built.
You can align the forms in two days; it took me a month. You can strip a hull in
a day — it took me a month (although I did sand in
there a bit). I admit that stripping I find very enjoyable and would
take my time doing it to make it last a bit longer — but that's
still a long time to be stripping a hull.
But four years is still a long time. When I started, Tristan was
still taking afternoon naps - now, on the weekends,
he builds with me. And Pascal wasn't
even born yet...
At this point, boat-building has become a kind of pleasurable time
occupier. I'm not really pushing myself to get things done by any
deadline, so going out to work on the boat is just an enjoyable way to
spend an evening. I still enjoy the problem-solving nature of working
on the Swift - every night there's some new problem I need to think
about. And planning what needs to happen next is also fun —
acquiring parts, seeking out the best way to build the next part, how
to make things work a bit better.
Building the tiller
posted 2007 January 8
I decided this was the week to build the tiller. Nice easy way
to get back into things. Little did I know.
I began by cutting the materials - per Greg's
instructions, I started out with a layer of hybrid. I further
decided to pull this hybrid on the bias, so that the strands will
transfer load further up and down the tube rather than right along the
same position. So I pulled the hybrid along the bias, rolled the foam
core, and cut.
Next up was preparing the carbon sleeve. The wisdom of the list is
to slide the sleeve onto a tube, and then pass the tiller through the
tube, feeding the sleeve on to the part as it goes through. Then work
the tube into place, tightening it and sliding excess off the end. I
slid this on to a PVC
pipe kicking around - the PVC is wide enough to let the foam core
pass through unimpeded, and then I will slide the carbon sleeve off on
to the layup. I couldn't get all of the sleeve on to the pipe - part
of it I just rolled up on a newspaper around a vacuum
tube of about the same width.
Then, wet out the hybrid, apply two layers of
3” unidirectional carbon, and then slide
through the PVC pipe.
And then, disaster. The foam core with the layup wouldn't fit
through the tube. And when I was trying to get the layup back out, I
broke the foam core. Disaster. I tried to
rescue the foam core by bonding a layer of carbon along it and
clamping it to a straight
edge, but that just left a bunch of divits that I would have
to go back and fair and sand. Alas. I need a new foam core.
Well, while that's in progress, back to completing the rudder and
centerboard finish. I sanded them both down so everything is rough (and the epoxy will
bond).
A few links
posted 2007 January 5
I was searching in the Swift mailing list archives, and came
across a number of interesting links:
- (link)
Trapeze harness report. Ron says that the Magic Marine Ultimate
(XL) harness is much better than the Gill offering.
- (link)
How to cut hybrid like a hot knife through butter - wait until the
epoxy is tack-free, and then cut with a knife or scissors. Greg
also says:
I do second Bill's suggestion of covering the whole sheet of
material used to make the CB trunk and internal bulkheads and
soldiers with peelply before cutting out the shapes. The lighter
weight fine grained peel ply is just as good as the coarse woven
stuff for our purpose and when the bulkheads are recoated with epoxy
after installation, the fine woven texture that it leaves behind
holds less epoxy on the surface.
- (link)
Greg's comments on Christian's
instructions on how to build the rudder box.
- (link)
Greg's comments on vacuum bagging, and tips on how to ensure the
bagged part turns out well. Greg bagged the internal bulkhead
parts.
- (link)
How to make hybrid tape.
Simply stick two strips of 1/2 inch wide masking tape (or time tape)
a few inches apart across the desired length of the hybrid
material. Cut down the center of the masking tape strips to release
the hybrid tape. When applying the hybrid tape to the job pull the
taped sides in opposite directions to create biased fibers. With the
masking tape on the underside you usually cannot see the tape but can
still completely wet out the fibers. Stray fibers along the edge will
also be held neatly and fairly blunt scissors can be used to cut the
Kevlar and your leftover roll of Kevlar will not have frayed edges. If
the bias hybrid tape is being used to reinforce along a curved shape,
say the bulkhead/hull joint on a Swift, snip the masking tape edges of
your hybrid tape every 10mm or so to allow it to flex as easily as the
tape and conform to the required shape.
- (link)
Greg's suggestions on how to strengthen the transom joints. If you
do a lot of beach landings, consider screwing (instead of
through-bolting) the bottom gudgeon to the transom - that way you
loose the gudgeon instead of the transom. Also consider bias hybrid
tape on the transom joint. Put hybrid on the back side of the
transom instead of s-glass.
- From the same post, a way of glassing small parts and ensuring
no bubbles (this would have been handy back in the beginning).
This method works very well for small parts where the glass cloth is
of a manageable size (not wider than your arm span). Paint the part
first with resin with a brush or roller before you place the cloth.
This allows you to get a much better control of resin across the
part, then lay the cloth over the part. You will have no bubbles
(unless you pick up the glass) as the resin filling the cloth drives
out the bubbles. With practice you will be able to get just the
right amount of resin to wet out the cloth but if too much or too
little use the squeegee on top and redistribute resin. Make sure to
roll up your glass in a clean and debris free way so you wont have
to pick it up to remove a boulder of something that got underneath.
- And finally, a comment about the "wax on/wax off" method to
ensure minimal resin impregnation at butt joints - save that resin
to be used with tape, where the weight will be put to better use. I
used something similar to this when I was sealing the top of the bowpiece.
Dry cedar absorbs a lot of resin, so does endgrain materials but
does not add much strength. Its clear that having the glass close to
the core with a little as possible waste resin under it is the best
situation. So to control more precisely the amount of resin I add to
the lay-up, I often paint or roll on, and immediately wipe off with
some rags, the base coat of resin. Wait just a bit for it to begin
to gel (so that no additional resin will soak in) before placing the
glass on top. A wet but slightly tacky gelling surface is good,
really well gelled surface is too tacky to move the glass if you
need to and past tacky is not giving a chemical bond. Pick up the
rags from the floor after your done (or leave them there forever)
and feel how much waste resin you saved from soaking in!! I think
this method makes a lighter product but not enough resin is left on
the surface to push out the bubbles so its not a soak up method as
described above. Remove small bubbles by applying pressure with the
squeegee though as I described above. If you have saved resin weight
you can then afford to reinforce joints liberally to stay near the
target weight but then with added stiffness.
Page 19 of 62
« First
…
«
17
18
19
20
21
»
…
Last »